6 EASY DIY PROJECTS TO UPDATE YOUR BUILDER GRADE KITCHEN ON A BUDGET
When we first moved into our, what I thought at the time, forever home I could have cared less what upgrades it had. I was approaching my due date with our first tiny human and all I wanted was storage. I knew I needed a large place to store all of the baby gear that was about to take over our lives.
It wasn’t until I had tiny human #3 that I felt the itch to start updating our builder grade home. This was also around the same time Pinterest was born. I went out and bought my first nail gun and miter saw with no idea how to use either…or even how to turn them on. You can thank Pinterest for allowing me to think I was able to operate power tools.
But I figured it out and the next thing I knew I was adding crown molding to whatever I could. Most of the projects I did to upgrade our home was done in the kitchen. It was the typical builder grade kitchen…honey oak cabinets and all.

There was nothing at all wrong with our kitchen. My husband actually loved the cabinets but I knew I wouldn’t be able to control myself and it was just a matter of time before I slapped some paint on them, among other things.
Updating your kitchen does not need to be expensive and you might be surprised what you can DIY. I listed some fairly easy and budget friendly ideas on how to take your builder grade kitchen from snoring to adoring. I know, that’s cheesy but I had no other word that rhymed with snoring.

Since I did all of these projects before I started this blog, I do not have any tutorials for you but I can direct you to some tutorials that you might find helpful. I know, I’m so sweet.
(This post contains affiliate links for your convenience. You can see my full disclosure here)
1.) Paint your cabinets.
This is usually the number 1 go to project when updating your kitchen. Painting your cabinets is not hard. I am not lying to you, I promise.
It’s time consuming like you wouldn’t believe but it was not hard. You can certainly hire this out but I was up for the challenge. I know DIYers who used paint sprayers and barricaded their garages to spray each cabinet door.
I didn’t.
I walked each cabinet door down to my basement and painted by hand only two cabinet doors at a time since that is all the room I had to work with in our storage room.
That could be the reason why it took me forever to finish. I cannot recommend Benjamin Moore’s Advanced Paint for this project more. It went on easy, leveled nicely and dried like a rock.
I painted by cabinets Acadia White. A few years later decided I wanted to have more fun and re-painted all of the lower cabinets Wedgewood Gray
…and then we moved.
There are so many tutorials on painting your cabinets online and on Pinterest. Miss Mustard Seed has a fabulous tutorial on painting your cabinets. I do plan on painting some shelving I have in our mud room with Benjamin Moore Advanced Paint and plan on documenting it so stay tuned.

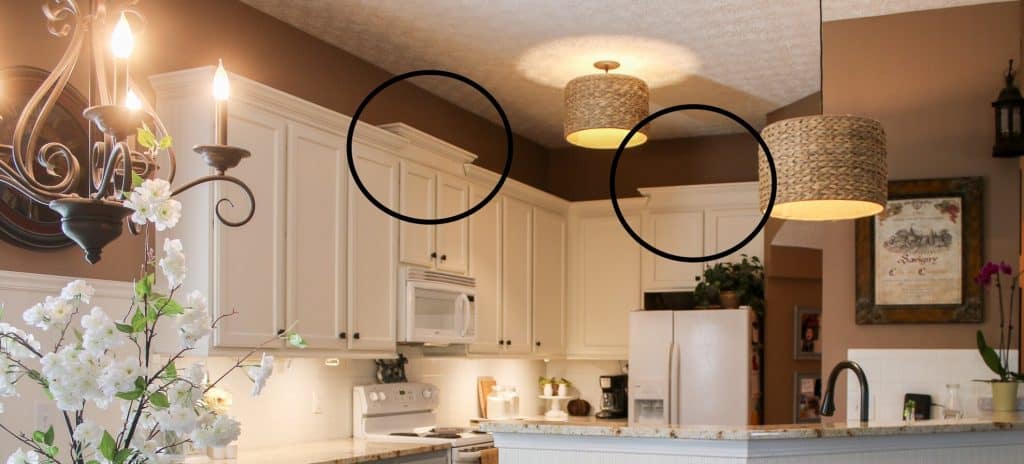
2.) Add crown molding to whatever you can
Nothing takes a boring builder grade kitchen from snoring to great quite like crown molding. The crown molding I added to our cabinets in our old house was the first attempt at crown molding that I ever did.
I still do not know how I pulled it off but I did. This tutorial from Sawdust Girl saved me. I still have my cheat sheet in my tool box and I feel like I need to put it in our safe.
Crown molding is tricky so I suggest taking your time and buying extra trim…to be on the safe side. I made a few extra trips to Home Depot those days.
I also added height to my cabinets above the microwave and fridge. I mainly did that for looks and also because I didn’t want to have to join two pieces of trim together. I knew that seeing the seam would drive me nuts. I attached the crown molding to MDF boards first.
The boards above the microwave and fridge were just wider MDF pieces. I then applied some wood glue to the top of the cabinets and laid the MDF boards with the crown molding to the top of the cabinets. I know, it sounds confusing and I was afraid at any second that the crown molding would come falling on my head.
It never did but if you try this approach, I’m warning you that it could happen.
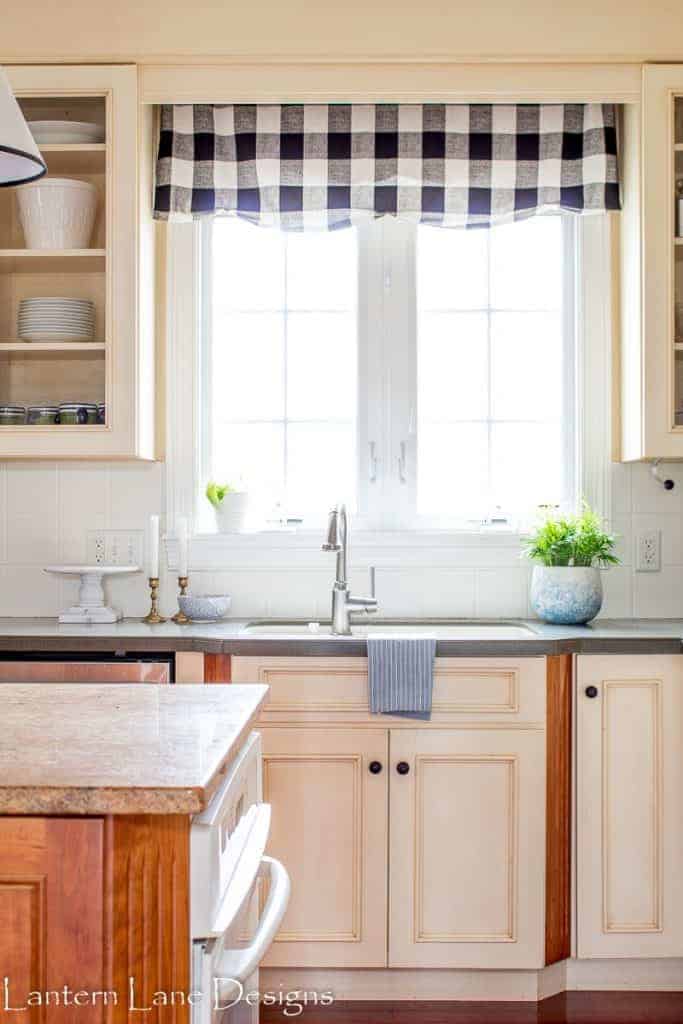
3.) Don’t forget your windows
This step is for any window in your house, really, but if you have a window in your kitchen, add some trim around it. You would be amazed with what a difference it can make. Don’t be afraid…it’s so much easier than crown molding; unless you add crown molding to the window trim. In which case, ignore that “it’s easy” part.
Kidding…sort of.
There are so many ways to trim out your windows. I went very easy in our kitchen and just added thin trim around the window. My one tip is to add your trim 1/8th of an inch from the edge of the window.
Paint the trim and the inside wall of the window white to mimic the look of wood. I did add some crown molding to the top of my windows. I used my cheat sheet from the cabinet molding. Once again, added the crown molding to a piece of MDF and then nailed in the MDF to the wall. In all honesty, it was not very difficult. I think adding craftsman style trim around your window would be the easiest. You can see a tutorial here.

4.) Become a fan of beadboard wallpaper
I love wallpaper, always have and always will. And beadboard wallpaper is the bomb. Talk about making life easy…get the look of wood without having to make any crazy cuts in large pieces of wood paneling. Sign me up!
While beadboard wallpaper is thick, it is very easy to apply. I’ve used both the prepasted and regular versions and both are equally easy to use. I added beadboard wallpaper to the ends of my cabinets, the one wall in my kitchen and to the wall on the peninsula. It was such an easy and quick way to add some character to our kitchen. You can see a tutorial on it here.
I just added beadboard wallpaper to our mudroom and you can see that tutorial here.
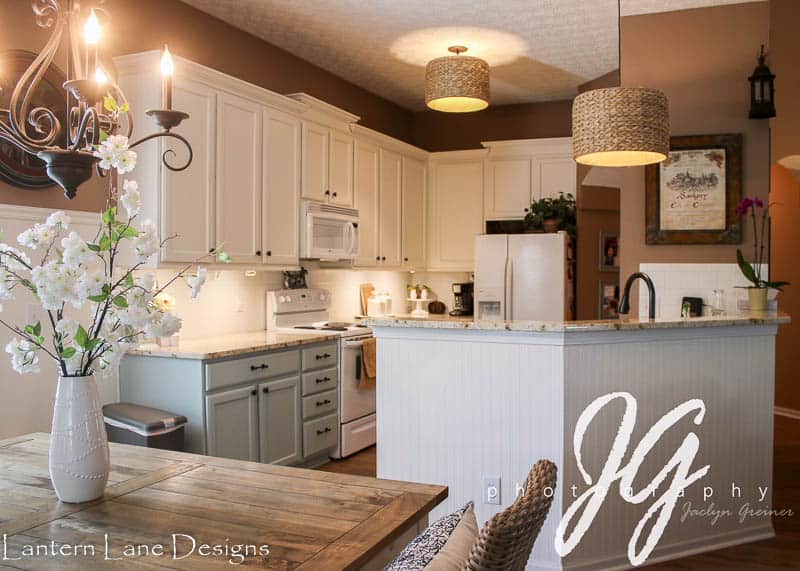
5.) Change out your lighting
If your kitchen is builder grade, I am going to go ahead and say your lighting is builder grade too. Switching out your lights can make a huge difference. You can also just paint your already existing chandelier like Rachel did here. You can see how I “made” my own pendant light shades here. If you have recessed lighting you can convert it into a pendant with one of these kits.

You can find some beautiful light fixtures on Wayfair
Click on any image to shop:

6.) Add in some window treatments
Oh, how I love me some window treatments. I can do a whole post on just window treatments alone and how easy they are to make. (Update, I just did. You can see my list of DIY curtains here). Instead though, I will just list you some of my projects I have done from no sew drapes to new sew window valances…all of which can add so much to a home. Just remember to hang those drapes high and wide and try to avoid having your drapes look like floods.
- Drop Cloth Curtains
- No Sew Window Valance
- No Sew Window Valance take 2
- Another No Sew Window Valance
- DIY No Sew Curtains And How To Fake A Pinch Pleat
- How To Hang Your Curtains To Hang Nicely (And Where To Find Inexpensive Fabric)
- (Stay tuned…I am about to make some Roman Shades…wish me luck)

I also did a whole post on where to find affordable curtains here if you are not a big DIY fan.
Click on any image to shop:
7.) The big stuff
And while I did not DIY our counters or floors, we did get new granite countertops and new flooring. The granite is called Colonial Cream. It’s more of white granite and less busy which I wanted. Our floors are Pergo (Nashville Oak) and for the few months we lived in the house after we got the new floors I was extremely happy with Pergo.

We replaced our faucet and added hardware to our cabinets. Those little changes made a big
difference.This faucet is similar to one we have had and has great review
s on Amazon.
I am in the process of looking for new cabinet hardware for our current kitchen and have been spending alot of time on Wayfair again. I’ll try to do a round up post but until then you can check out their selection here.
And because I love a good before and after…

I had a hard time leaving this kitchen when we moved. I put alot of blood, sweat and tears into this kitchen and we were really starting to become best of friends.
If you want to save this for later you can pin it here
6 easy DIY projects to update your kitchen