[mailerlite_form form_id=8]
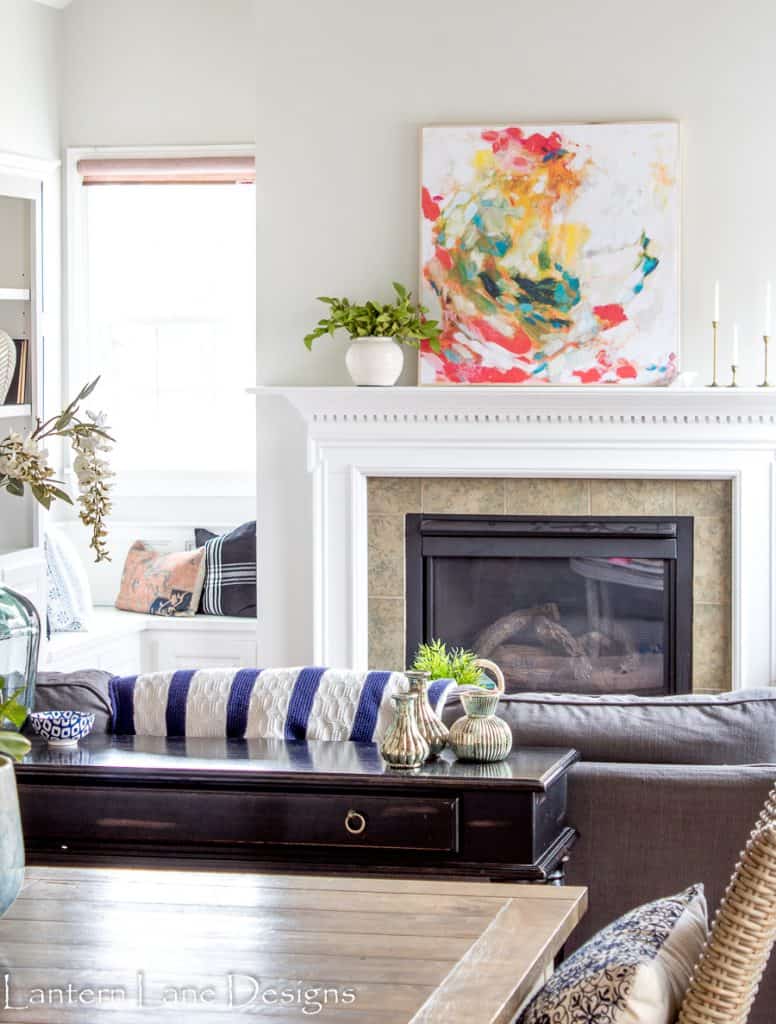
This post is dedicated to all of you photography and artistically challenged people out there quite like myself. I am not a professional photographer, I am not an artist, nor do I have an artistic eye. I eyeball things until I like it and call it a day. There is no rhyme or reason to my decorating. My new artwork in my family room was designed with just my eyeballs and some free photo editing tools. It cost me under $20.
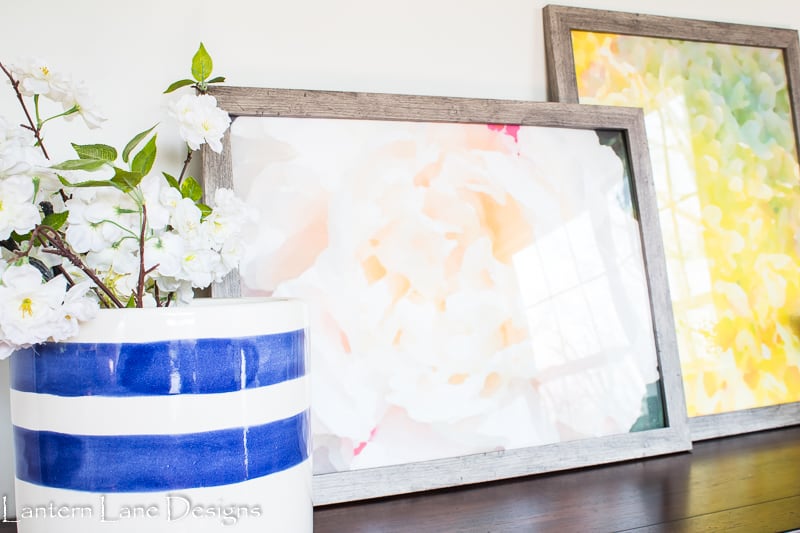
I have THE hardest time finding art for my home. Until recently (like yesterday) I did not have any art hanging in my house. I can never find anything I like, or the size is wrong, or I don’t like the frame, or the price is redonkulous. I give up and instead just buy mirrors. It’s a problem I’m working on.
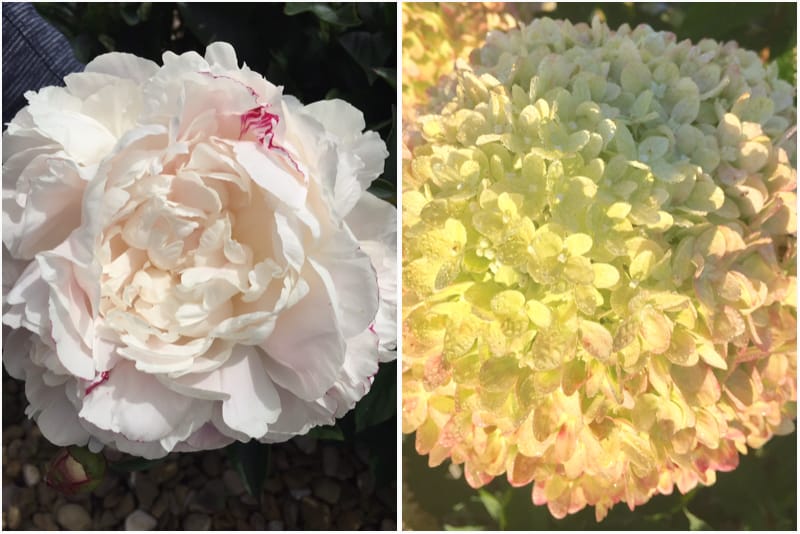
I also have a black thumb. The family that lived here before us did not though. I had the most beautiful peonies and hydrangeas in my yard this year. I hope my black thumb stays away from them. I snapped a few pics of the these gorg flowers just in case I killed them and then had an idea…
A few months ago I found an app that turns any picture into a watercolor. For a while there I was turning every picture on my phone into a watercolor. It’s fun to play with. It also makes a great gift idea. My husband found a picture of my Mother-in-Law’s childhood home. I used the nifty app to watercolor the picture of her home, had it developed at Sam’s Club, framed it and gave it to her as part of her birthday gift. So fun and easy.
I decided to give my flowers a turn at being watercolored. These pictures came straight from my iPhone. No fancy camera required.
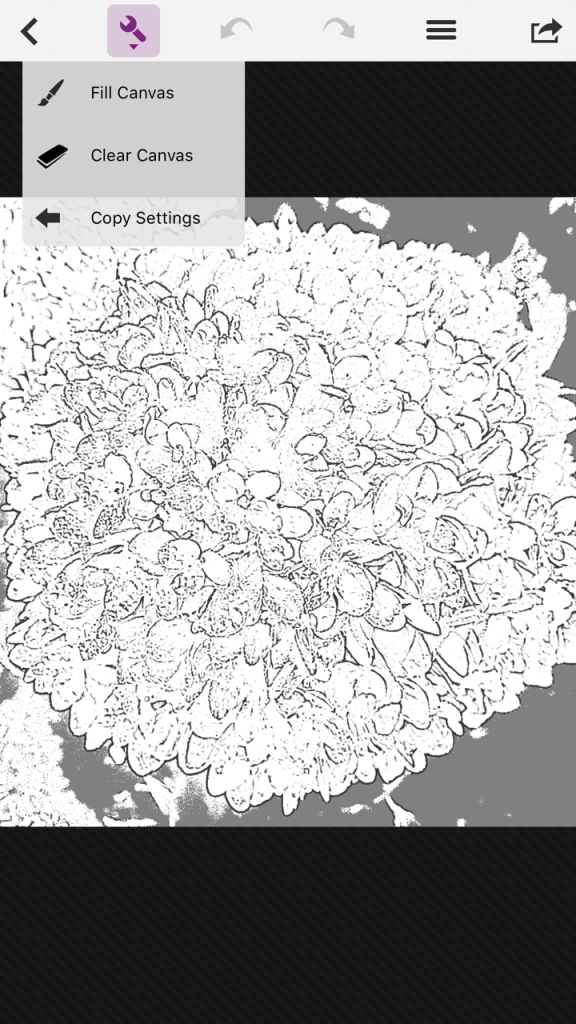
I’m sure there are other and probably better ways to watercolor a picture but this is how I did it. Quick and easy. I used the app called MobileMonet. It might have cost a few dollars but I really do not remember. I’m getting old and forgetful. There are other things you can play around with in the app but this is my quick tutorial for you.
Once you upload the picture you want to watercolor in the app you will need to “fill the canvas” first. This will turn it into a “sketch”
And then at the bottom of the screen click on the three squares icon and start playing. I used the “watercolor” feature but there are others you can use.
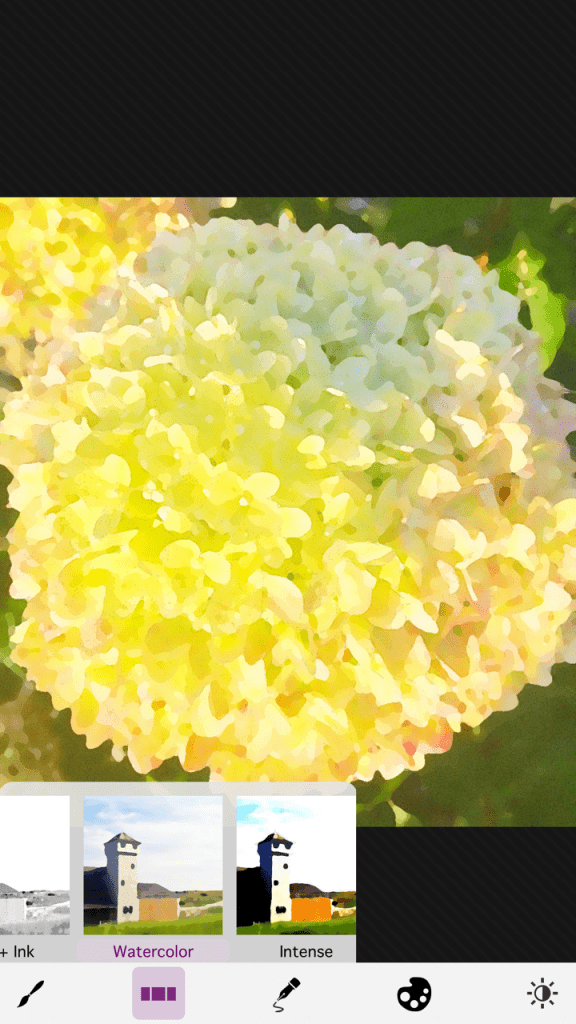
You can also play around with the color and intensity of your design using the other icons at the bottom of the screen. I just played around until I got it to how I liked it. But that’s pretty much it. Save your picture to your camera roll and figure out your next step.
The next step can be a number of things. For my Mother-in-Law’s picture I just sent the picture to Sam’s Club and had it blown up and printed there. Very easy. Some places require you to change the pixel size if you want to have your picture enlarged. It took me a a few days months to figure out how to do this. That’s usually the case. I used PicMonkey.com. It’s free to use and user friendly. Again, there are a ton of things you can do in PicMonkey but for this I just used the reszing option.
Head over to picmonkey.com, click edit and chose where you need to upload your picture from. Once your picture is uploaded click on the Resize button on the left hand side.
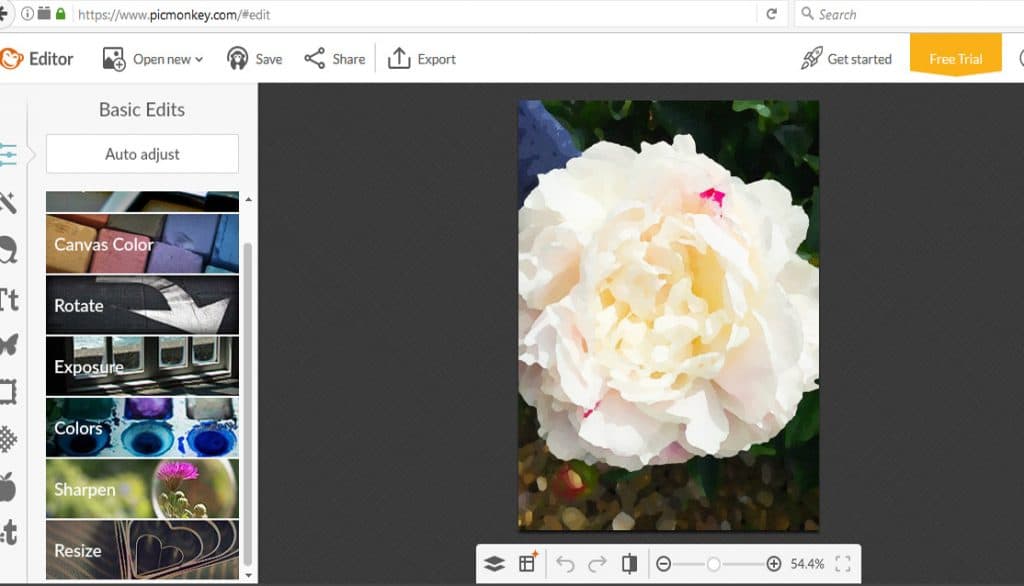
Now you need to start making educated guesses regarding your pixel size. For an 18×24 print you will want to be around (minimum) 2500 pixel size. Add your pixel size and hit apply. Now save that picture on your desktop.
You can use any printing service you love at this point. I really wanted to try out Staples Engineered prints for this project. I had envisioned a different outcome for this picture on my wall but as usual things never go as planned. The engineered prints are very inexpensive and I wanted a matte finish to my pictures. I didn’t want a glossy sheen to them that a typical photo gives me.
One more quick tutorial. Head over to Staples.com click “design now” button and click “engineering prints in color”. In the pop-up window click “add files” and add your picture that you had already resized and saved. Once your picture is uploaded you can adjust the size of your print by clicking the “media” tab on the left hand side as well as the orientation (landscape or portrait). I did 18×24 since I was doing two photos. You *might* have to head back over to PicMonkey to resize your photo if things aren’t looking how you like. I wanted my pictures to look abstract-yish. That’s my professional photo talk for you. I just wanted a close up of the petals for this design, not the whole flower. Again, I’m just eyeballing what I like. No rules. Once finished, add that bad boy to your cart and head to your local Staples store to pick it up a few hours later.
I originally was going to use some spray adhesive and spray these photos onto a canvas and make a wood frame to wrap around the canvas to look more “finished” but when I was in Michaels looking for the canvas I saw these frames and they were on sale for a really really good price so I thought I’d just make my life a little easier this week and use these frames instead. I still used a little spray adhesive to attach the prints to the cardboard of the frame. Helpful tip…these prints are just paper. One big goof up and you can rip your print and have to start over. Just be careful in assembling your picture. And your done. I love that these pics have meaning to them too.
Want to save this for later? You can pin it here:

I have so many other ideas now that I started this project. And it’s so inexpensive that I can switch out these pictures as the seasons change.
Follow me on Facebook and Instagram! Come pin with me on Pinterest!
You might also like!


Let’s Stay Home Free Printable