A QUICK AND EASY TUTORIAL ON HOW TO PAINT YOUR VASES WITH NAIL POLISH TO GET THE MARBLED LOOK.
[mailerlite_form form_id=8]
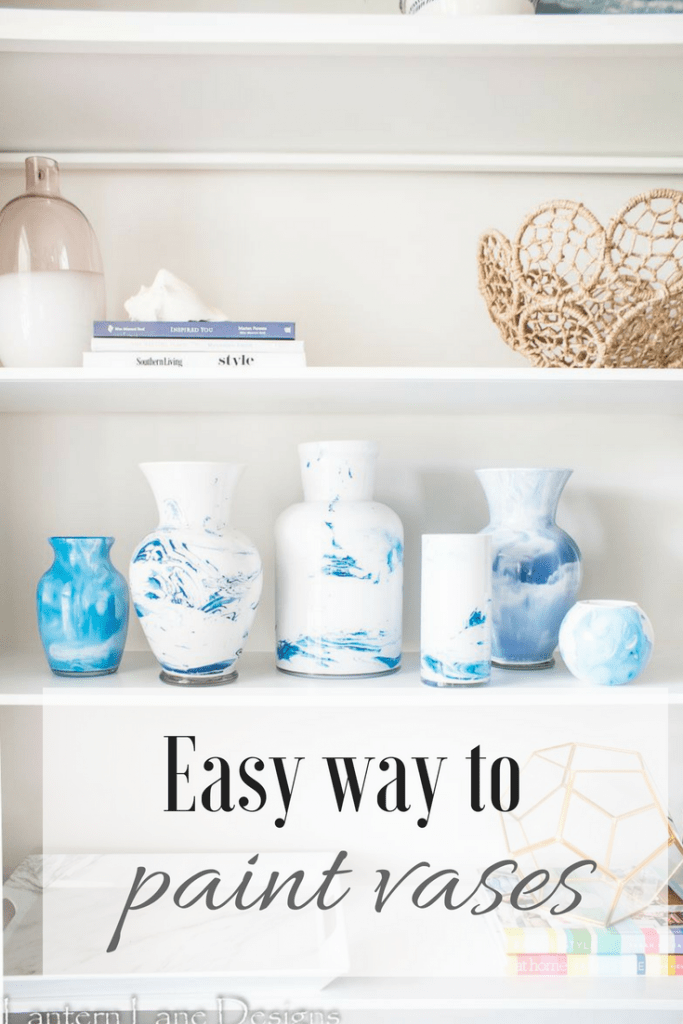
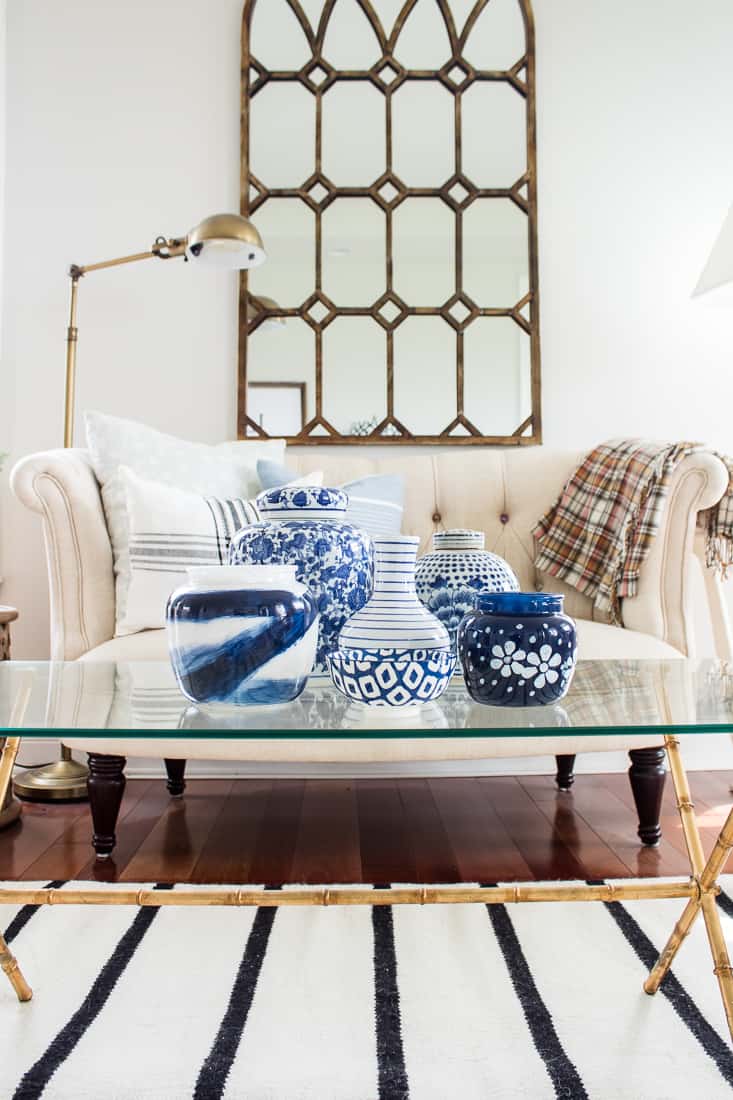
Do you guys remember those eggs and pumpkins I marbled? And do you remember those vases I just painted? Let’s just say you do, k? Ideas were starting to form in my head about getting those two projects to come together. And then one day I saw this vase and I knew I had to try that random idea that was forming in my head. It’s like Grandin Road read my mind. If you have ever faux marbled anything like this you will understand why I marbled so many vases. Despite all of the fumes I inhaled, this project was so much fun…almost therapeutic actually (maybe that was partly due to the fumes). I might faux marble a vase everyday to calm my nerves this summer while the kids are home from school. I did this project a few different ways and I have my favorite way. Each way works but you’ll get a slightly different outcome each time.

There will be more faux marbled vases in my future…I am sure of it. I have some projects I love and some projects I despise. This project I love.

(This post contains affiliate links)
Items needed:
- Paint and nail polish. I just used acrylic paint and any shade of blue nail polish I was able to find at the dollar store or Walmart
- Clear glass vases~the dollar store has some great clear vases for this project.
- Rustoleum Clear Gloss Spray Paint
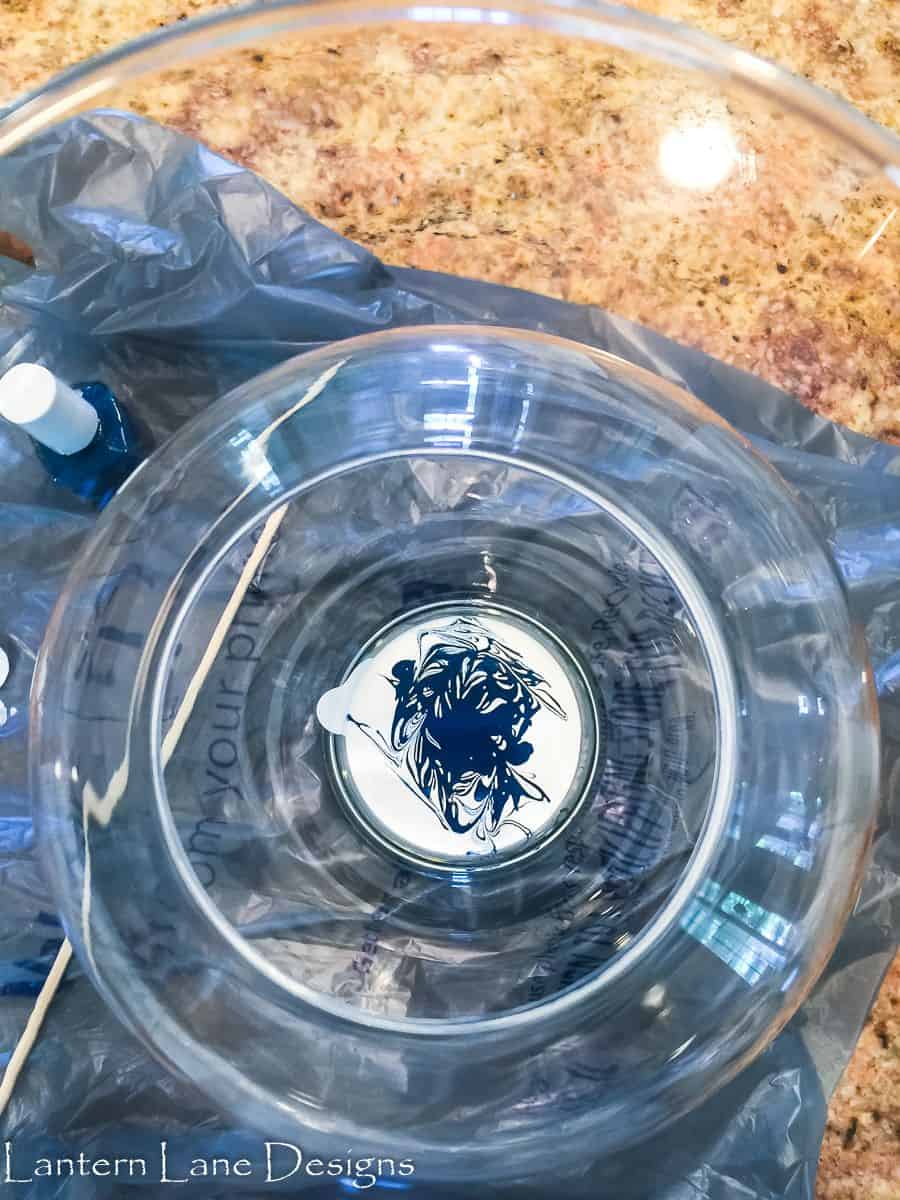
I call this first attempt practice round 1. For this round, I poured white paint inside my vase, flipped the vase over and let the paint cover the inside of the vase (just like I did with my painted vases). Once the inside of the vase was dry (well, sort of dry because I have no patience) I dipped my vase in a container of water and blue nail polish (just like my Easter eggs).
I really did like this version but I wasn’t getting the look I wanted. And the nail polish was on the outside of the vase. I wanted a smoother look and feel on the actual vase itself.

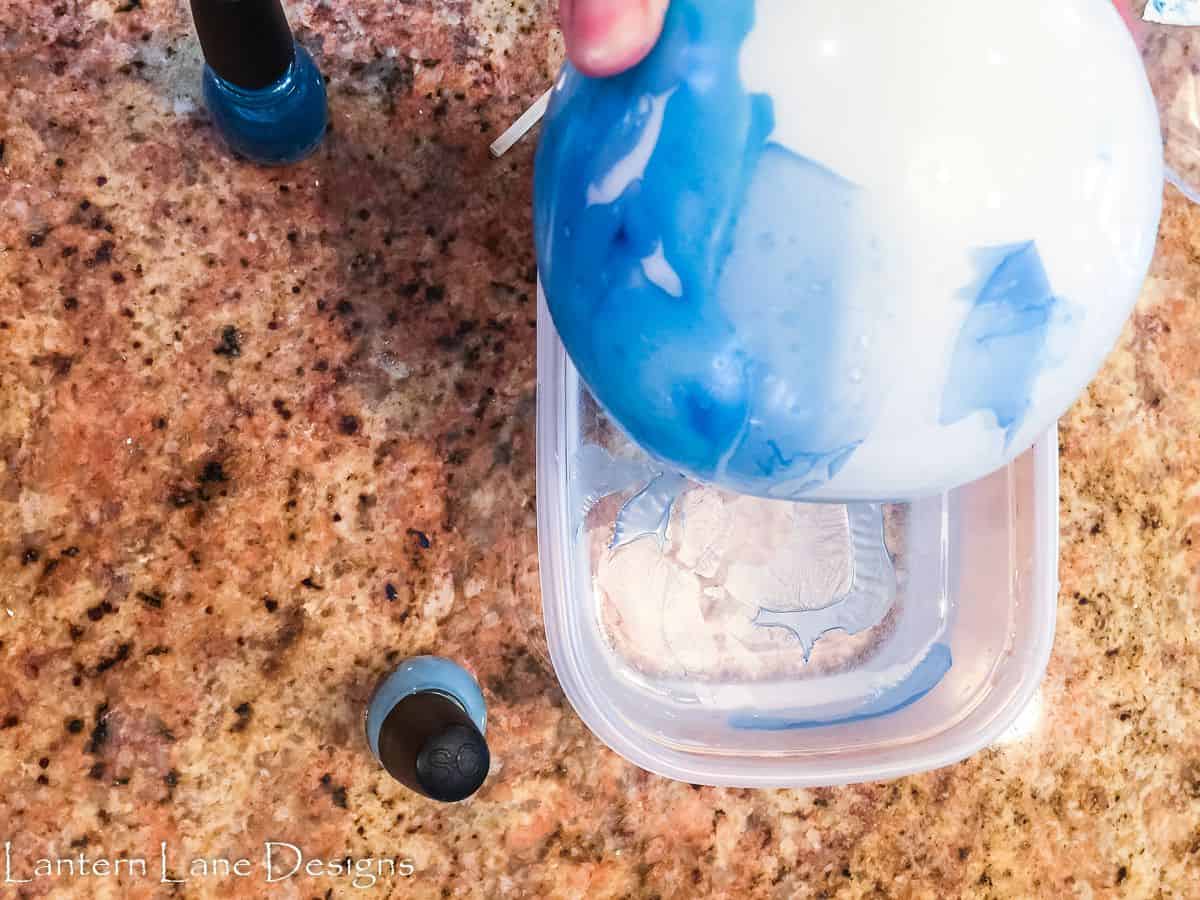
So I moved on to practice round 2. For this round, I added white paint AND blue paint to the inside of my vase. With a long skewer I marbled the paint inside the vase first.
I flipped my vase over and let the paint slide around the vase. And oh my goodness, I was having so much fun. Maybe too much fun…the kids kept looking at me like I was a nut. This practice round was going so well…but when I flipped my vases over to drain out the extra paint and to dry, the two paints started mixing too much into each other and I was getting a less definite marble look. Get what I am saying? I still loved the vase but I wanted it to look more like the one I saw online.

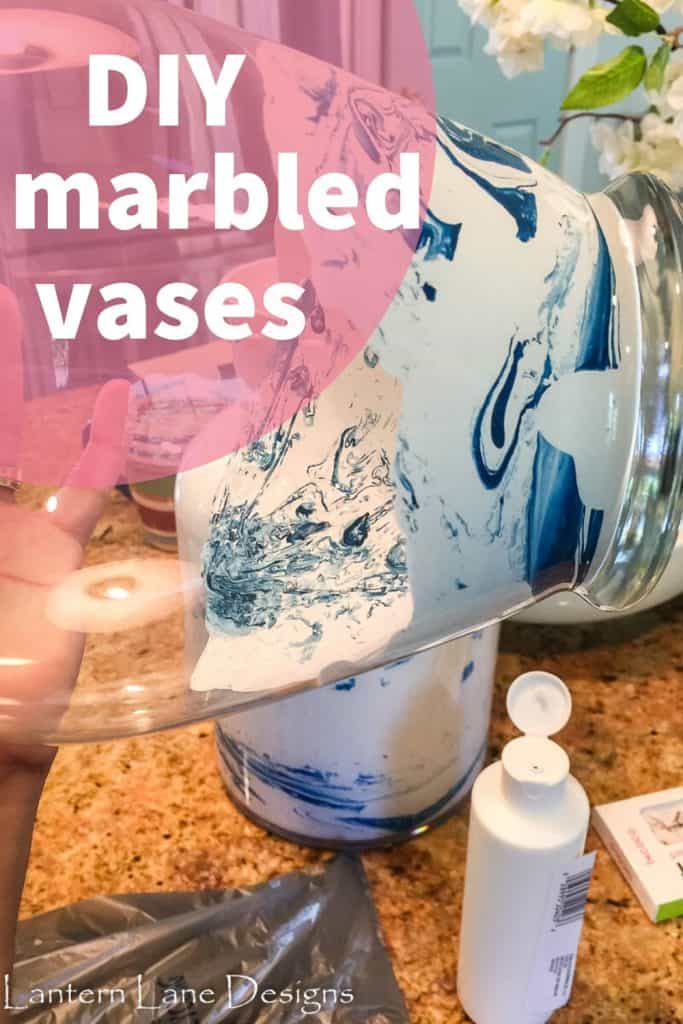
So then came practice Round 3 (and technically round 4). Instead of using white and blue paint, I used white paint and blue nail polish. The nail polish held it’s own much better when mixed with the white paint. This round was my favorite. If you have a smaller vase this should be pretty easy peasy. But it’s the larger vases that require some more work. Once again, I added paint to my vase, added in some nail polish, swirled it around in the vase with a skewer, flipped the vase on it’s side and let the paint do it’s thing.

For these bigger vases you will need to keep adding paint and nail polish as you go. My first attempt I didn’t add as much nail polish as I should have so one of my vases has a less marbled look. The other vase I was very liberal with the paint and nail polish. I tried to work in sections and kept adding paint and nail polish as I worked my way up the vase. If you do not like to waste then this project might make you cringe. There was a good amount of paint that came out of my jar onto my plastic as it was flipped over drying. But you know, a girl has to do what a girl has to do to get that marble look.

Once all of the vases were dry, I did spray a clear gloss spray paint to the inside of the jars. I’m hoping this protects the paint if I ever want to put fresh flowers and water in my vases. I haven’t done that yet and I’m a little scared to try so do not take my word that the spray paint will project your vase. I’m not joking though, if you ever get stressed out just start faux marbling something. I could watch paint slide around a vase all day long.
If you want to save this for later, you can pin it here:
In case you were wondering:
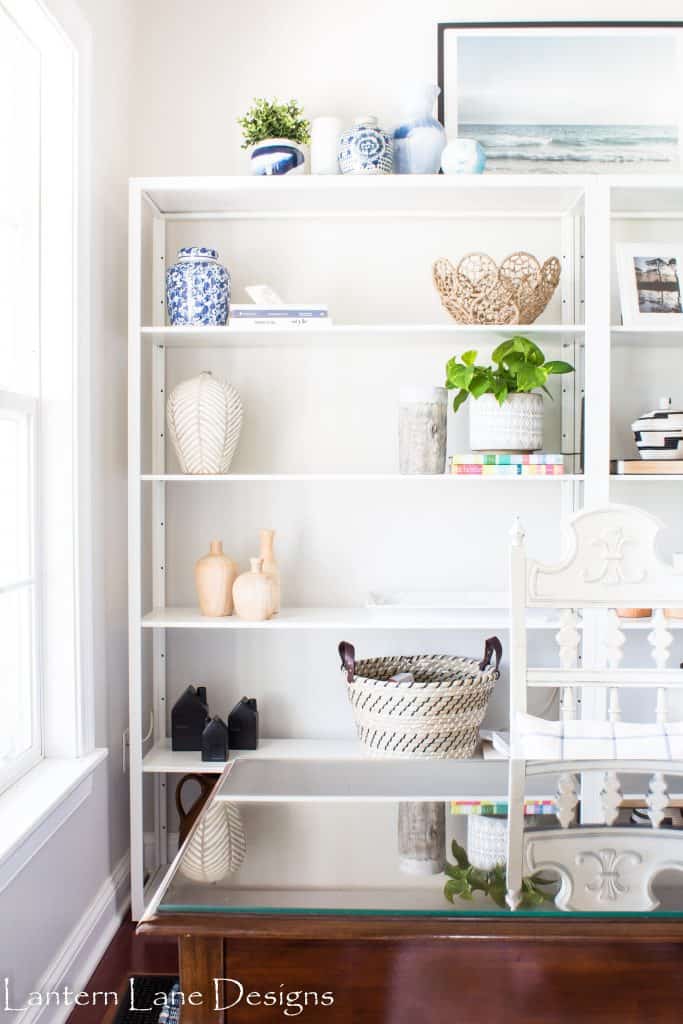
- Paint Color~Behr Silver Drop
- Shelving~ IKEA
- Blue vase (similar and also similar)
- Macrame Bowl
- Seagrass Basket (you can purchase them individually in the store)
- Black candlesticks
- Round Vase (Similar)
Follow me on Instagram and Facebook! Come pin with me on Pinterest!
[mailerlite_form form_id=4]
You Might Also Like!

So so beautiful! Quick question: how did you keep the paint from dripping out when you flip it over to dry? Do you dry it in sections or use a hair dryer?
Hi! I put my vases upside down on either a plastic bag or parchment paper and just let the extra paint drip out after the whole vase is painted. Some vases had lots of paint drip out and some just a little. Good luck!
They turned out really pretty. Adding this to my to-do decor list! I’m working on some vases now and just did the inside paint so I understand that waiting on it to dry process! Would love for you to share this with us at Merry Monday.
Thanks Shirley!
This is so clever! They look beautiful! Would love for you to come link up at “our Inspired Collection!”
Thank you and I will!
I might just take your advice and de-stress while watching some paint marbling:) They turned out absolutely gorgeous! Thanks for sharing at Vintage Charm! xo Kathleen
Thanks so much!
I tried some nail polish marbling to make some valentine hearts a few years ago and loved it, I’m not sure why I’ve not done any more! I love your vases and that you tried all the different methods so we don’t have to! Pinning, I’m not sure when I’m going to need to do this but I know I will some time!