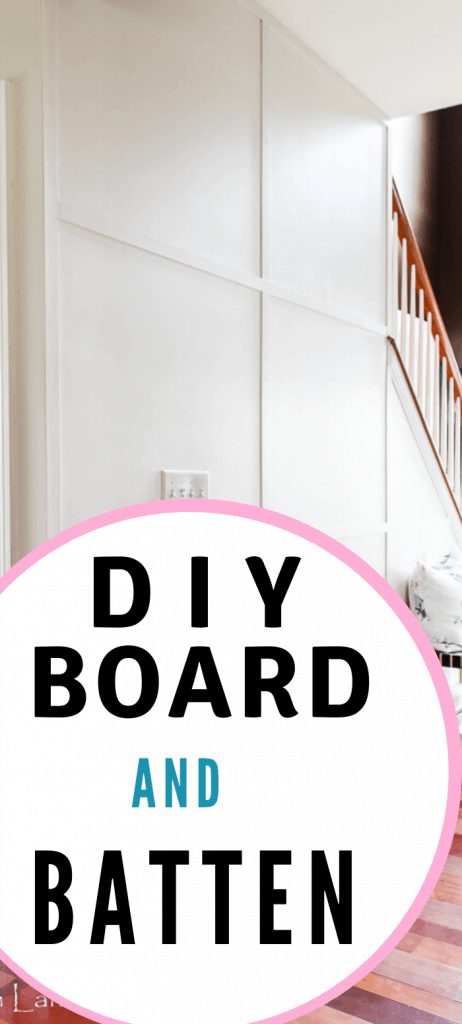
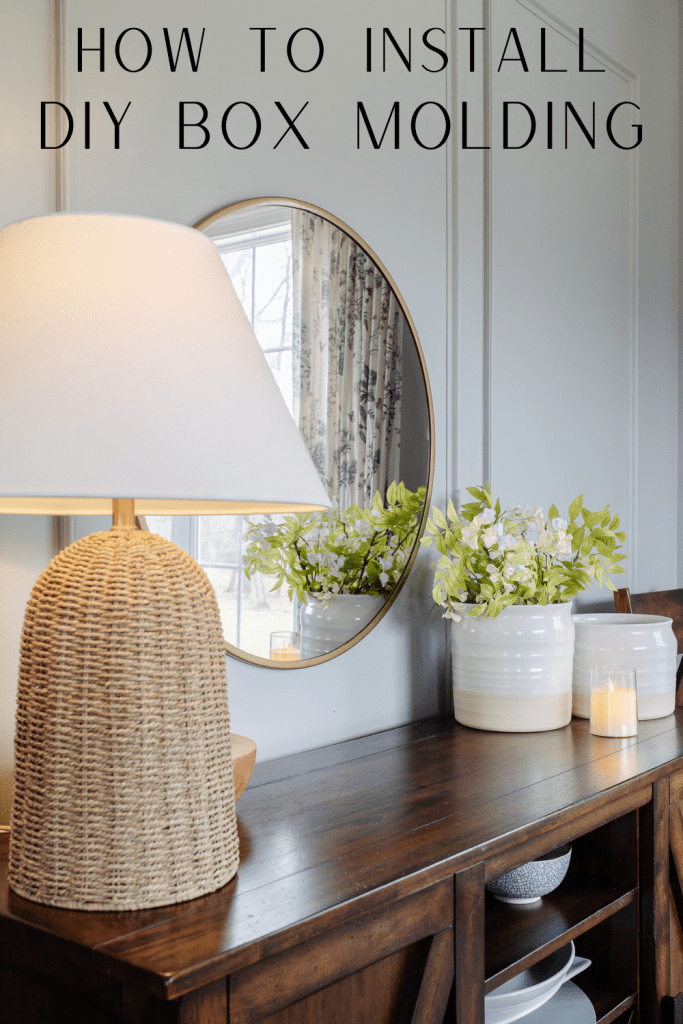
DIY Box Molding (Picture Frame Molding)
How to easily install molding to your walls to add texture and dimension to your room
It’s been a while since I last did a DIY project and I forgot how much of a love/hate relationship I have with DIY projects.
It’s also been so long that I lost my nail gun and I think mice have built a home in my miter saw out in our barn.
That didn’t stop me though. I had a vision in my head of what I wanted and I knew the only way to get it was to face my fears of Gus Gus and find my nail gun (or buy a new one…because that is what I did).
My dining room has been feeling a bit flat to me. Something always felt off no matter what I tried with the decor in that room.
I knew I wanted to paint the dining room to try to liven things up in there. I also knew what a few pieces of wood being nailed to your walls can do to your space.
Just like the power of paint, there is the power of DIY wainscoting.
Don’t believe me??
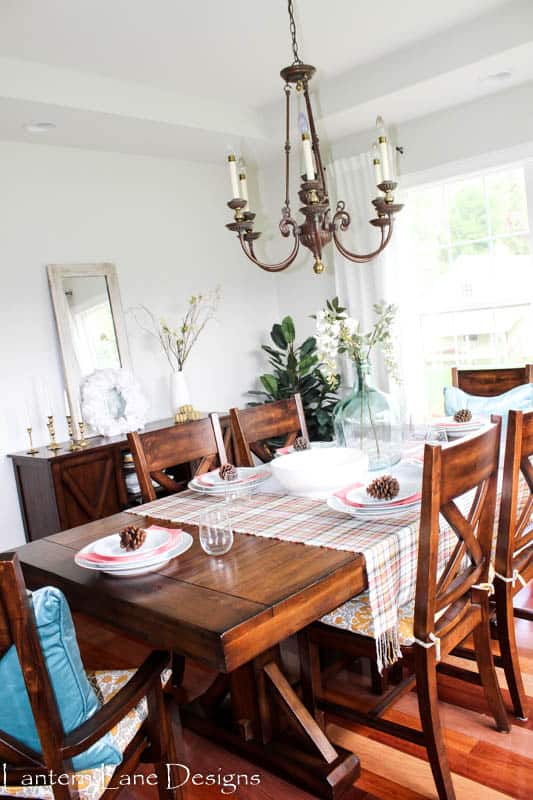
Many years ago, when I first started blogging I gave our dining room a makeover.
It’s hard to look back at old pictures…not because my design style has changed (which it has) but because I had no idea how to edit my pictures.
Here is what my dining room looked like 5 years ago (crooked picture and all)
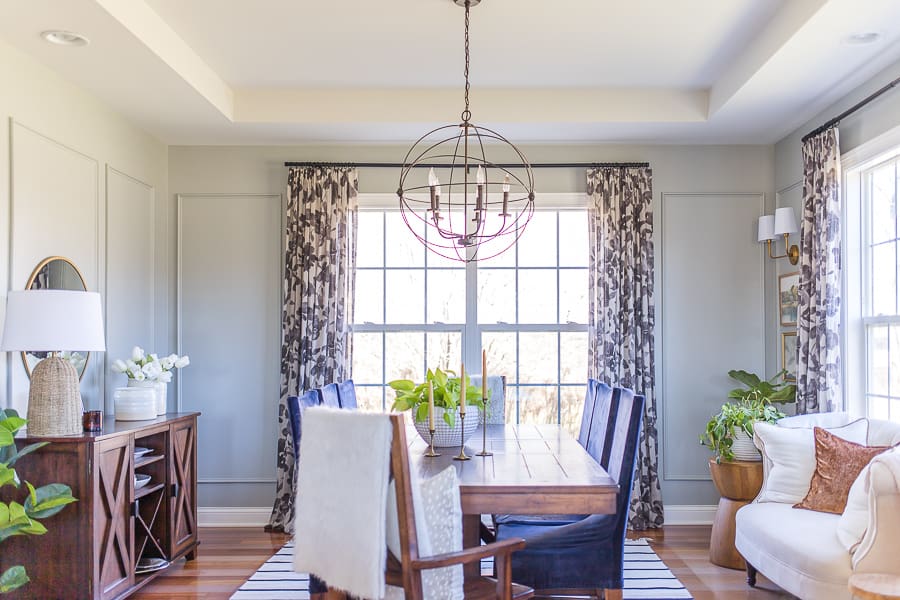
And here it is today
Not only is this picture straight but the wainscoting just adds texture and dimension to the room and really makes it feel “sophisticated”(ish)
I will have to say so myself but this wall looks amazing.

Click on any image to shop:

Some of these molding projects can be considered easy DIY projects. There is no need to fear these projects.
They might look intimating but if you have patience and know how to work a level, installing wainscoting is pretty easy.
Yes, that is what I said
Items needed for your DIY Wainscoting Project:
(This post contains affiliate links. You can see my full disclosure here)
I’ll go into more depth about each of these below but here is an idea of what materials you will need.
Wood Trim
Nail Gun (and gauge nails, I used Brad Nails). If you do not own any Ryobi one tools you will need this battery pack too. Can also be purchased here
Laser level (not a huge deal if you do not have one but you will need some form of level)
Caulk or spackle
Sanding block
Tape measure
Wood Trim:
I used this cap molding from Home Depot. You can find this trim at any home improvement store though.
I love this stuff since it is lightweight and inexpensive. It cuts so easily and is easy to install since it is so lightweight. It makes doing these projects alone so much easier.
Nail Gun
I guess technically I did not lose my whole nail gun. I found the air compressor but I have no idea where the actual gun part is.
So I decided to buy myself a birthday gift and purchased this cordless nail gun. The dog was very appreciative that this nail gun did not need an air compressor.
I already had the Ryobi One battery for our drill so all I needed was the gun only (not the battery pack)
Happy Birthday to me! I’m sure I will have more plans for myself to install wainscoting again in the future. I guess now I have to since I just bought myself a new nail gun
You can also just use a hammer and nails to do this project but if you go this route you will definitely need a nail setter too.
Box Saw:
I really wasn’t joking about my miter saw out in the barn.
Gus Gus and all his mice friends have moved into our barn and I only go in there when I need to….and I announce my arrival before entering so they know to scatter before I see them.
And it’s also dead of winter here so I didn’t want to be walking to and from the barn for this project. Since this wood trim is so easy to cut, I was able to to get this project done with my box saw only.
Easy Peasy
Laser Level
I bought the laser level for this project and at first I didn’t really use it and thought I just wasted some money. I then decided to use it and could have kicked myself for not using it sooner.
It’s not the end of the world if you do not have one but if you do, it can make things easier. Keep reading to see why.
Caulk or spackle:
This is where I will not sound like a professional. In all of my DIY projects that has to deal with wood trim, I have never used caulk. I always use this spackle

I use it to fill my nail holes and I use it along the wall to fill any gaps where the wall and trim meet. I just find it easier to use. Wood filler would work too.
Again, this is not professional advice…just what I use and it could be the completely wrong thing to use.
Step by step guide to installing wainscoting
The name of this game is plan, plan and more planning….
and then measure, measure and more measuring…
and then level, level and more leveling…
If you can get things measured correctly and leveled…this is a piece of cake.
I also recommend taping up a rough draft exactly how you want your box molding to look to see it with your eyes first. You can also draw it on your wall with a pencil first.
I decided I did not want a chair rail and would prefer longer boxes. I did that for a few reasons. The biggest reason was because I knew this would be the easiest route.
I also have two large windows in our dining room. I thought longer box moldings would look less busy in my dining room.
Likely, I was just telling myself that since I did not want to have to deal with installing a chair rail.
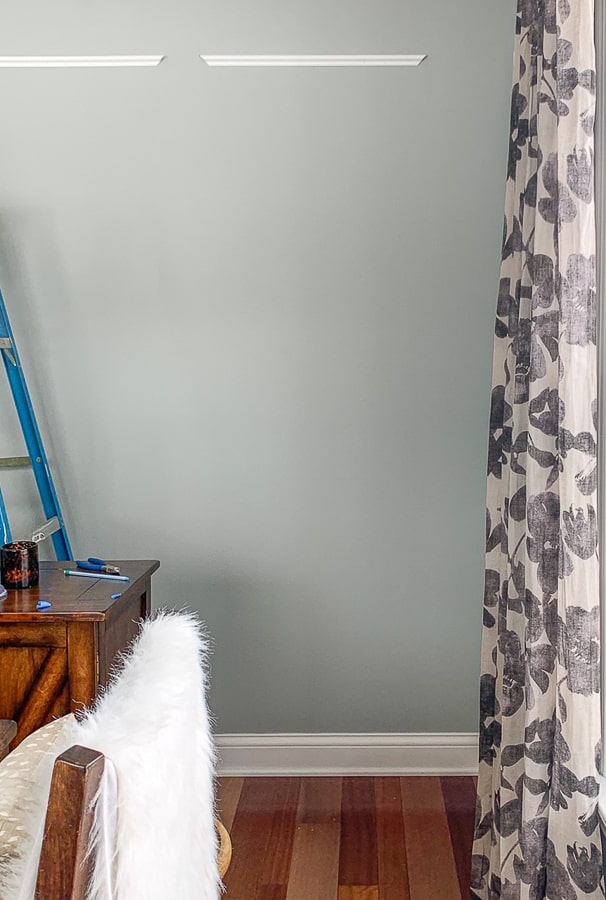
I also lined up my molding with the window trim. At first I had the molding going up further to the ceiling but once I taped it up and saw how it looked, I didn’t love it.
And that is why you do a rough draft with tape first.
Also, learn from my mistake…pay attention to where your outlets and air vents are on your walls. The previous owners had a thing for outlets and they are everywhere in this house.
Make sure when you measure you consider where those dang outlet and air vents are
.
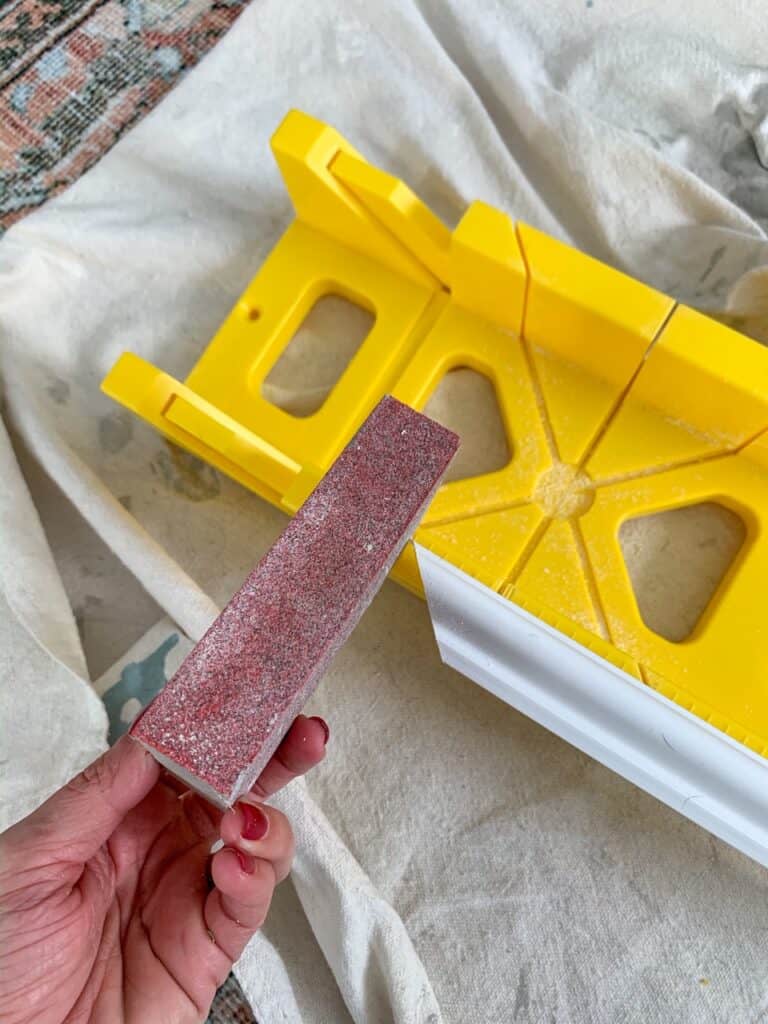
Start cutting your molding
Once you know your exact measurements, start cutting your wood. Like I said, I used a box cutter and it was easy as can be.

Cut each angle at 45 degrees. Be mindful of your trim. My trim was a bit ornate so I had to make sure I was cutting the trim the correct way to make the angles line up correctly.
I cut enough wood for one box only at first. Once that box was up on the wall and I knew that size was definitely going to work for me, I repeated those same exact measurements for the rest of the walls since I wanted them to all be uniform.
Since I was using a saw, my cuts needed a little light sanding.
Nail your wood to your wall
I did this step two different ways. I started off taping my boxes up making sure everything was level and the corners matched up.

(Notice that dang outlet??? Ugh, that was a close one)
I then used my nail gun to nail the trim to the wall. If you do not have a nail gun you can use a hammer and nails.
This process was good at first but after a while I got impatient with the tape. Some of the boards started shifting with the tape and throwing me off.
That is when I pulled out the laser level….which I should have done sooner.
I started off with installing the top piece and made sure that was level as can be.
And then moved on to the left and right piece using my level to make sure as I was nailing my wood to my wall and that the trim was following the level line on the wall.

(Note on the laser level…if you get this level make sure to get the green laser instead of the red. The green laser shows up better on your wall compared to the red).
And I know there are better ways to use this laser level but at one point this was my situation

If you read directions like I do (I don’t) then don’t be afraid to get creative when using this thing.
I only used nails to attach my trim to the wall. I have commitment issues and if I ever want to change things up down the road, this trim will be easy to remove with just the nails.
No liquid nails or construction adhesive was used for this project. I cannot commit on those levels.
Caulk/Spackle seams and nail holes
This part is the boring part but it must be done.
You will have all kinds of nail holes. If you used a hammer and nails or if any of your brad nails from your nail gun did not go all the way into your trim then you will need to use a nail setter to sink the nails in more so you can spackle the hole

It takes no time at all but it is one extra step
You can also use wood glue to glue to the two corners together with a clamp but I just didn’t have that in me. I was being lazy and I was fine with it
Let me just show you the power of spackle though
Here is a corner before spackle

And here it is after I spackled it

It’s like magic.
I also spackled the the gap where the wall and trim meet. This isn’t the end of the world if you skip this step but it does make your trim look more finished.
Paint your trim
You can paint your trim any ol’ color you want to but I obviously painted my trim the same color as my walls
(PS…my walls in my dining and living room are Farrow and Ball Light Blue)
You can also paint your trim before you install it to your walls but I just found it easier to paint my trim once it was already installed.
And that’s it!
See, nothing to it.
All you need to do is face your fears and find your tools!
If you want to save this for later, you can pin it here:
You Might Also Like!