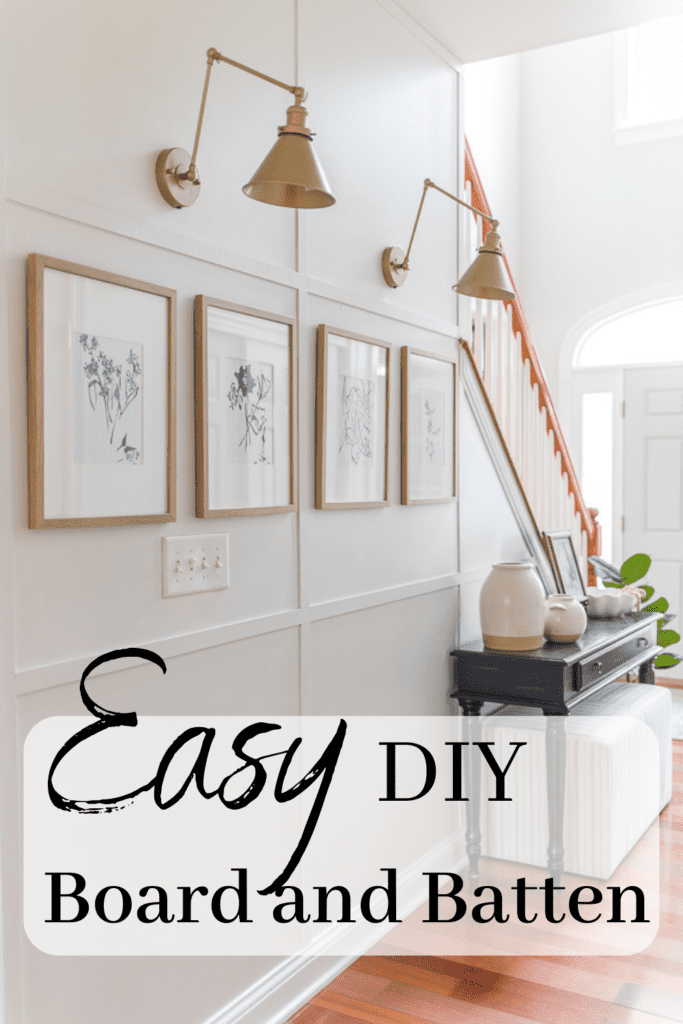
DIY Board and Batten Entryway Wall
How to install board and batten for under $100. I’ll show you how to easily install board and batten to your walls to add character to your home.
This is my third board and batten project and each time was a different and entertaining experience. And each time the end result was so much better than what I originally started with. This time though, I got my stuff together and worked smarter.
Well, actually the first time I installed board and batten I had my dad do it for me so I worked real smart that time. The second time should have been easy but I ran into way too many issues that made me think I never wanted to do DIY board and batten again.
The third time was the charm though. This isn’t true board and batten by definition. This is the paint your wall white and add some battens to it tutorial. But the battens I used this time made ALL the difference.
I usually use primed MDF boards. They come in all different widths and are only a few dollars for an 8 foot board…but they are thick.
They are thicker than your typical baseboard which means that unless you get creative your battens will stick out past your baseboard.
In the past I would run a batten horizontal against the baseboard so the verticals battens had something the same size to butt up against.
Make sense? Didn’t think so.
That’s why I used something different this go around. I used lattice strips. They are a little bit more expensive than MDF ($6.40 at my Lowes per 8 foot piece) and they are not primed BUT they are the perfect thickness for a baseboard.
Better yet though, they are so easy to work with. They are lighter so doing this project solo was so much easier and since they are thinner nailing them into the wall was a breeze.
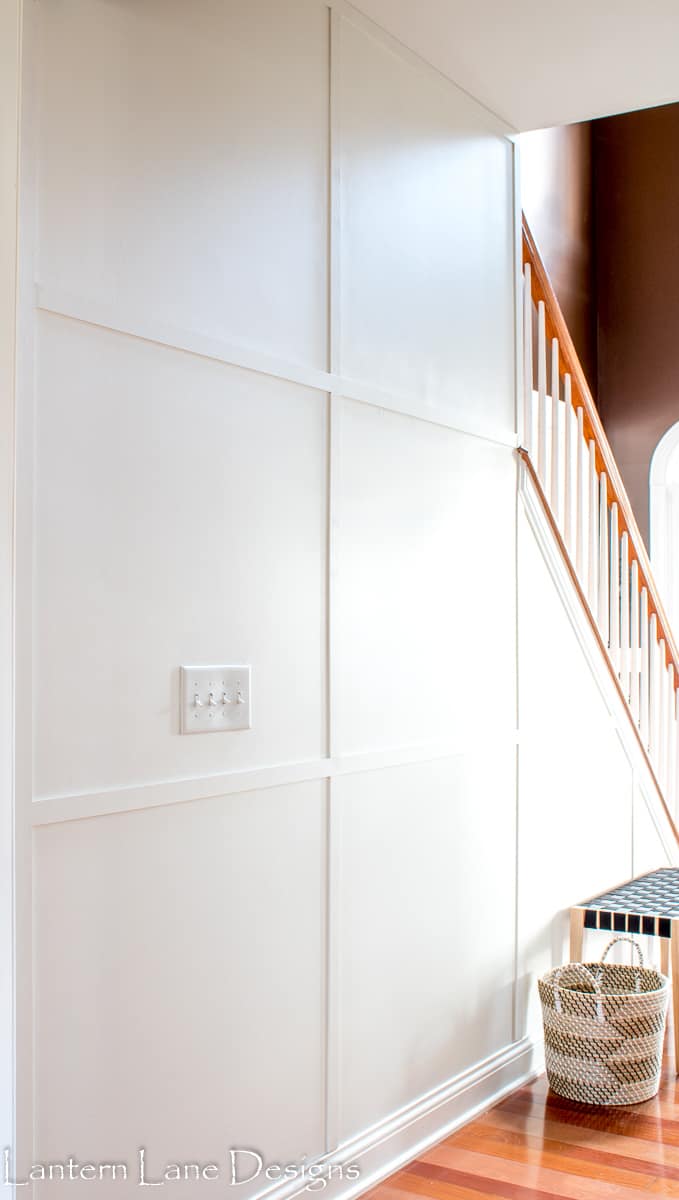
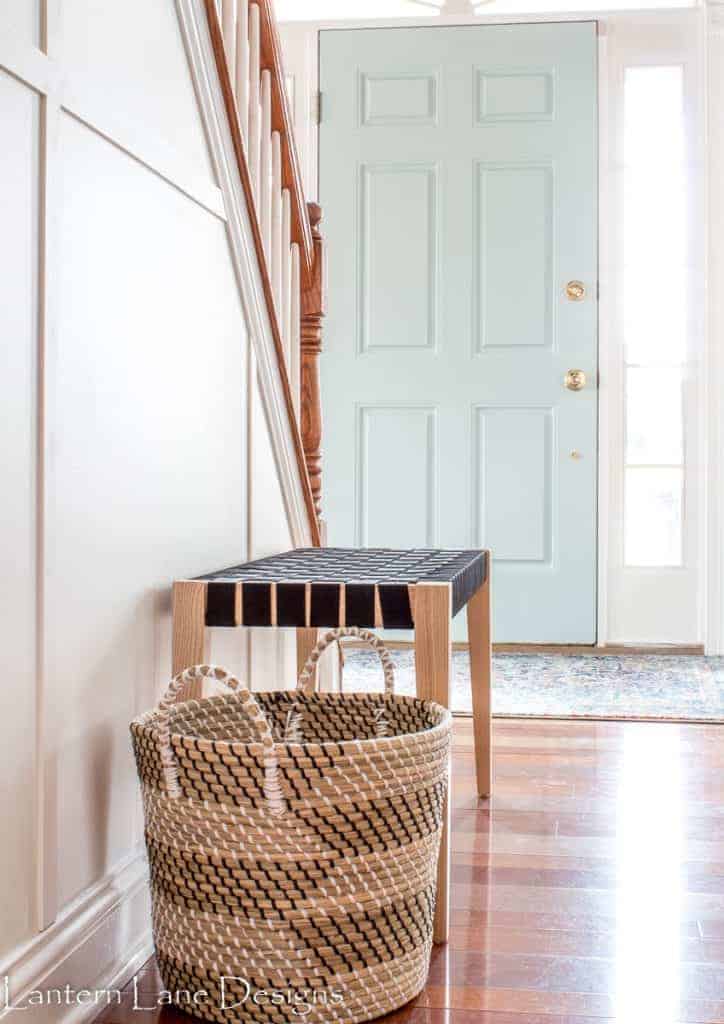
There is just something about adding molding to your walls. It’s almost like magic. Our entryway has seen some changes over the years. The board and batten just adds some more texture to the space. These are some of my favorite DIY projects. It looks intimating but really it is very easy to do.
I’ll do this tutorial in steps but first here is a list of the items needed:
Items needed for Board and Batten Wall
(This post contains affiliate links)
- Trim..a trip down the aisles of Home Depot and Lowes never disappoints.
- Paint for the wall and trim (I used the same paint for each)
- Angled brush and foam rollers and any other paint supplies
- Nail gun…don’t freak out. A hammer and nails works just fine but a nail gun is.so.much.fun and is much easier. I do not think my nail gun is being sold anymore but they have come out with cordless nail guns that look ahh-mazing.
- Miter saw…again don’t freak out…you can use one of these too.
- Wood filler or spackle. I used this
- Level of some sort. I didn’t have this laser level at the time I did this project but I wish I did.
(I was using my iPhone to take pics while I was working so these pics aren’t the best but you’ll get the idea)
How to install Board and Batten
Step 1:
Start off by painting your walls white. I used Sherwin Williams Dover White in satin finish. I have also used paint in a semi gloss finish for these projects to mimic the look of wood (not sure if that fooled anyone though). You can also just use trim paint.
Step 2:
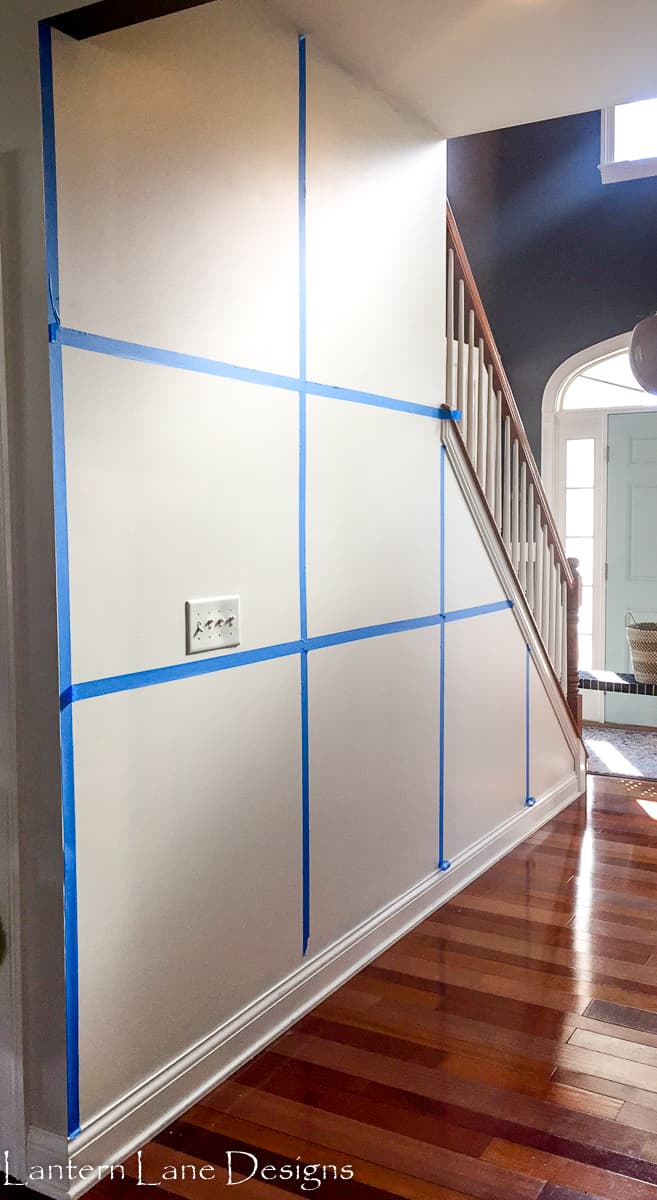
Use painters tape to plan out your grid. To be completely honest, I didn’t do this step in my other two attempts at board and batten. It was an extra (and pain in the butt) step but so worth it. It probably saved me alot of headaches and swear words this time.
I am not a math wizard and getting the squares on my wall to be the same size wasn’t easy and at the end of the day they aren’t the same size.
You need to take into consideration the height and width of your wall and then add in the batten measurements and subtract something from something and divide something by something…I was lost.
After the 16th attempt I just eyed it and it turned out fine. The tape helped to make this process a little less confusing.
Step 3:
Measure and paint your perimeter pieces.
For me that was just the batten running against the ceiling and the batten running down the side of the wall. Since my trim was thin I was able to skip having a piece of trim running along the baseboard. I probably could have still put some trim there for looks but why go to the extra trouble?!
I measured multiple times and made sure those pieces fit correctly and then painted them before I installed them.

Step 4:
Measure (and paint if you feel like being a go-getter) the remaining pieces. This part will be different for everyone. I installed the vertical pieces first and then added the horizontal pieces in.
Some boards I painted before I installed them and some boards I painted on the wall depending on my mood.
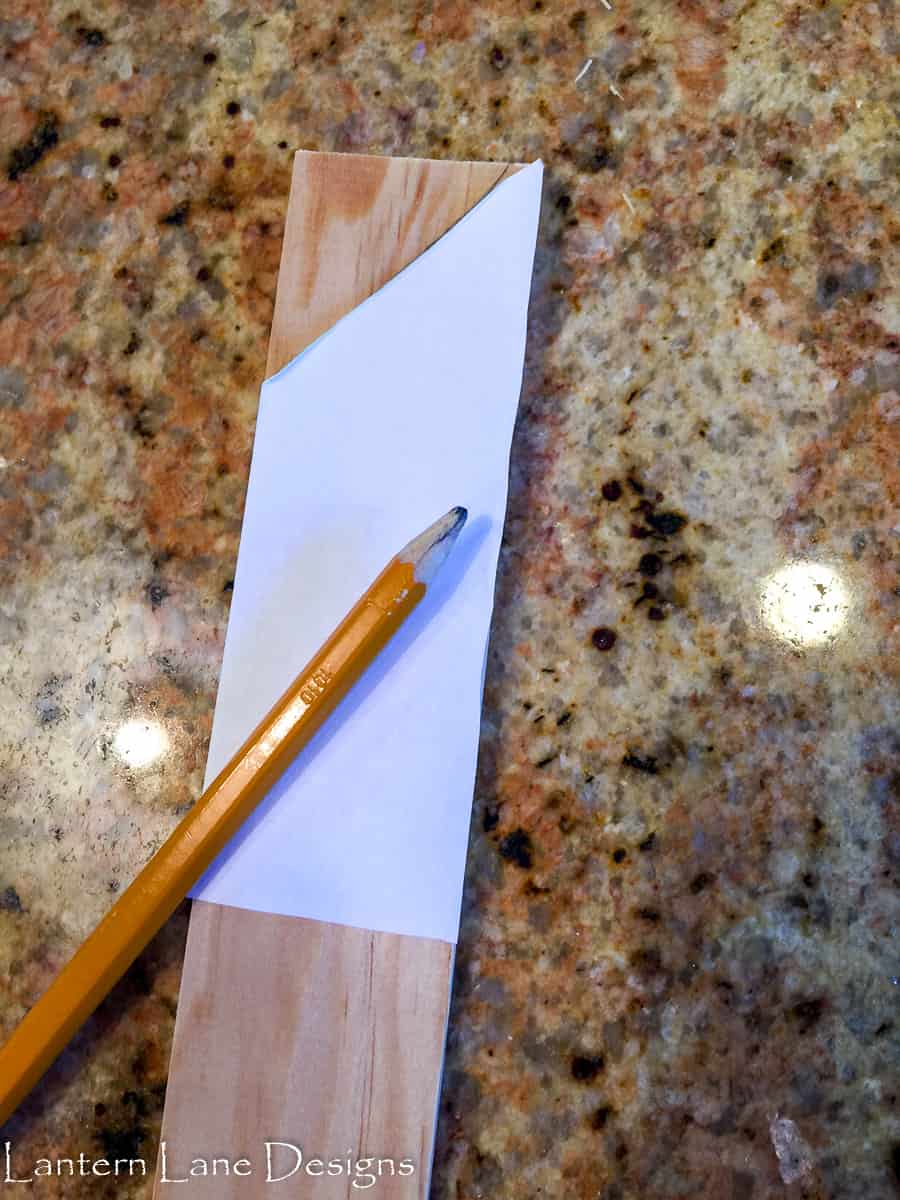
Most of my cuts were pretty simple until I got to the stairs. I had to get creative when trying to figure out what angle the stairs are.
I am sure there is a tool for this and I think I actually own it but I was too lazy to find it so I used paper instead.
I cut a piece of paper to the exact width of my trim. I made sure to know exactly where that piece of trim was going to be and that my paper was level on the wall and had it overlap the trim of the stairs and creased the angle.

I traced the angle on my batten and brought my nifty and very professional piece of paper to my miter saw and adjusted my saw to where I needed to cut to get that exact angle and hoped that it’d cut to to the angle I traced on my board. If you saw has a laser this process will be pretty easy.
I apologize if I confused the living daylights out of you but if you have any idea what I just said then you are welcome.
Step 5:
Fill your nail holes and any spaces in between your battens. Spackle is an amazing thing. Even if your cuts are all wonky and things aren’t lining up perfectly do not fret..just add some spackle.
You might also need to caulk (or spackle) some gaps between your battens and the wall. I didn’t have to do this step this time since my boards were thinner and were easier to nail into the walls and therefore creating less gaps (another plus of using lattice over MDF).

I went over everything with another fresh coat of paint and was done!
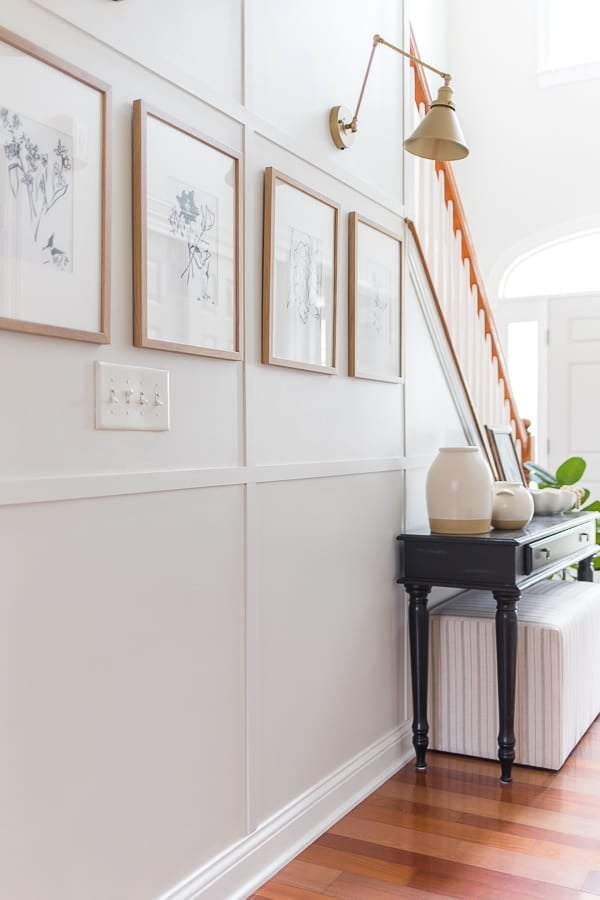
Board and batten is my favorite DIY project. For the most part it is so easy to do and is pretty versatile. Adding this little bit of trim to my entryway as an accent wall has made such a big difference.
I still need to hire a professional since our ceilings are so high to paint the rest of our hallway. I plan on painting the rest of the walls the same color as my board and batten wall so everything looks cohesive. Update:Done!
This hallway/entryway got a little makeover after everything got painted Silver Drop by Behr.

This will not be my last board and batten project this house will see and now that I know how easy lattice trim is to work with I am not actually dreading the next project. Whoop Whoop!
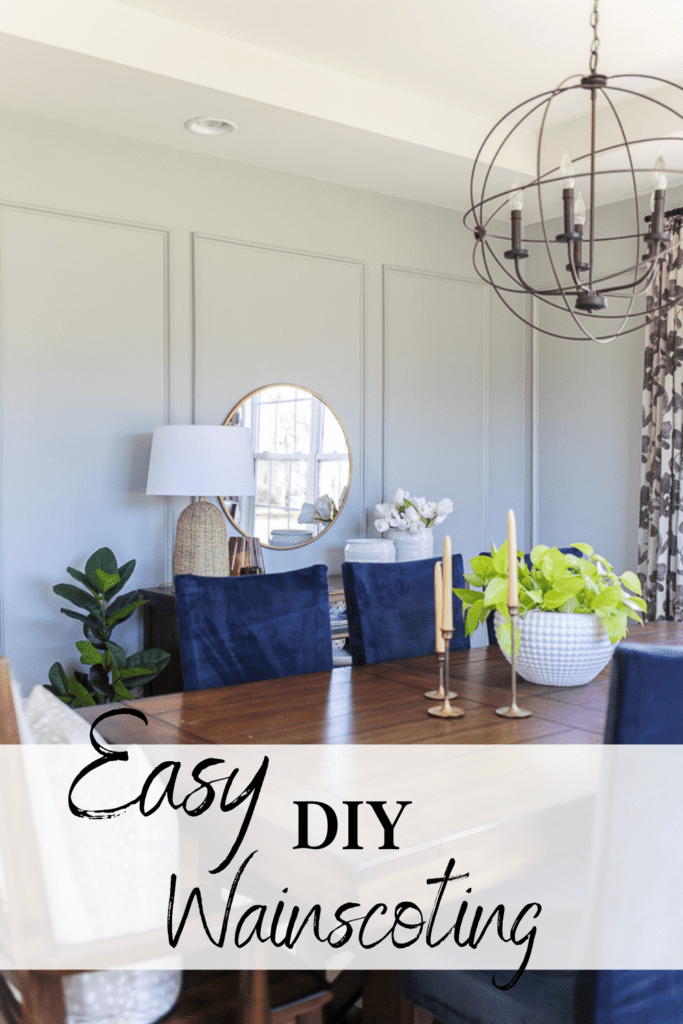
I recently added DIY Wainscottig to my dining room and it I can’t tell you how much I love it. Again, it is amazing what some trim can do to a space.
If you want to save this for later you can pin it here:
Follow me!
Pinterest//Instagram//FaceBook
[mailerlite_form form_id=4]
How to install board and batten for under $100. I’ll show you how to easily install board and batten to your walls to add character to your home.
You Might Also Like!
DIY Wall Panels (DIY Wainscoting)
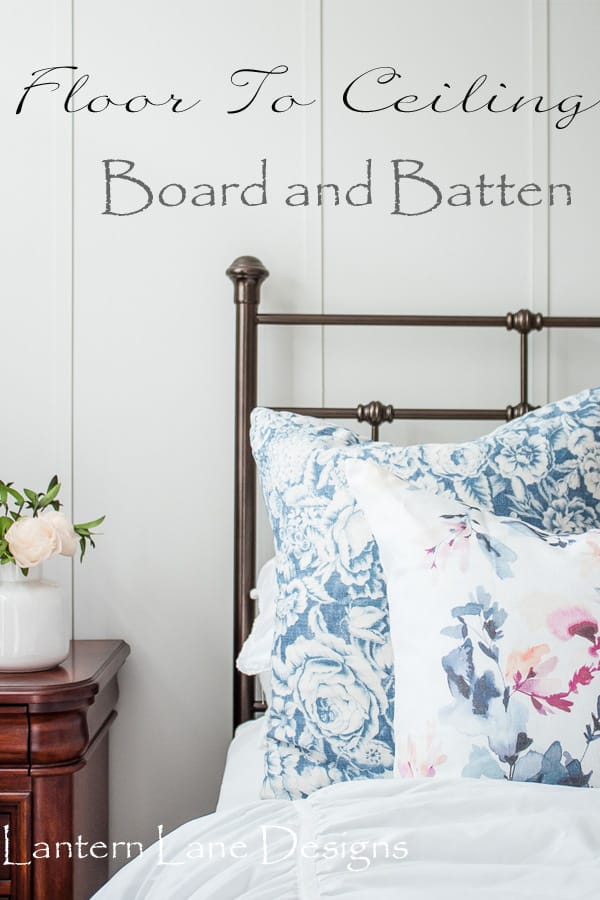
Floor To Ceiling Board And Batten

How to hang beadboard wallpaper (horizontally!)
How To Paint Interior And Exterior Doors