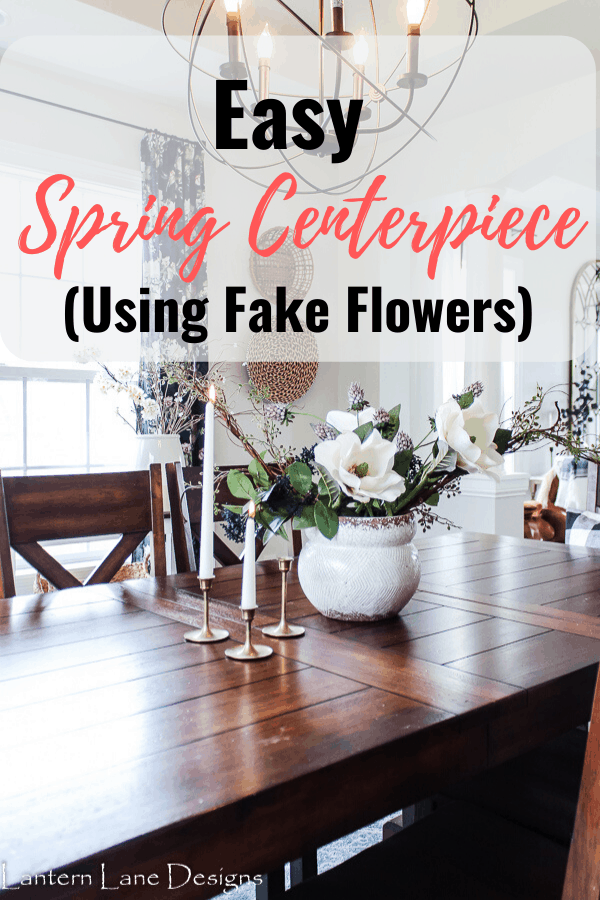
DIY Floral Centerpiece Using Fake Flowers And Easy Tips On How To Make A Flower Arrangement
Okay, let’s just get this out of the way before I start talking about my DIY centerpiece. If you looked very closely to the cover photo on this post you would have clearly seen my daughter’s ride on horse hanging out in the other room. Yep, it’s like part of the family now and I don’t even notice him…even when I’m snapping pictures for the website. And if you missed it, I am sure you can spot him now. Ha!
OK, now back to the post…
If you look up faux flowers in the dictionary you will likely see a picture of my face. I love me some fake flowers. Really love them. As in, I need an intervention.
I’ve been doing really well lately though and have been adding more real plants into my house. You can check out my post on easy indoor plants if you do not believe me. But the fake floral section at Hobby Lobby got the best of me the other day and everything was 50% off….Ahhh!
I saw a picture another blogger posted of her beautiful floral centerpiece and I knew I had to give it a go. And with spring approaching, I thought I could wish it to come sooner with fake flowers. It’s worth trying, right?
Let me first say before we get into this project, I might be queen of fake flowers, but I am not queen of floral arrangements. I have struggled with them for a few years. I can’t tell you how many times I got mad at a faux hydrangea and chucked it across the room.
This post will show you what I have learned along the way and some of my tips (so you do not have to throw any fake hydrangeas across the room.)
DIY Floral Arrangement Supply List
- Vase
- Flowers and greenery of your choice
- Dry black beans (or rice)…this isn’t a joke or part of a recipe, because cooking and I are not friends
- Wire cutters (optional)
Vase:
Your vase is your base (I’m a poet and I didn’t even know it). But seriously, the wrong vase can ruin your arrangement. You want something with a good size opening but not too big and not too small. This is depending on what you want your arrangement to look like. If you want your flowers to be standing more straight up then go with a smaller opening. If you want your flowers to span out more and droop a little, go with a bigger opening. I found my vase at Hobby Lobby. Shocking, I know.
Flowers:
I like to mix my colors and my heights. I like to have an assortment of some shorter/droopier greenery, some taller branches to add some height and then some flowers for color. This is what I had in my arrangement:

- Greenery. I used these and had no idea what they were until I got home and looked them up. I think I found a new favorite greenery. I was looking for droopy eucalyptus but these caught my eye and look so realistic…even though I have never seen the real thing before-ha!.
- Tall Branches. You can also use branches from your yard in your arrangement.
- Tall florals I loved the color of these and new they would add height and color to my arrangement.
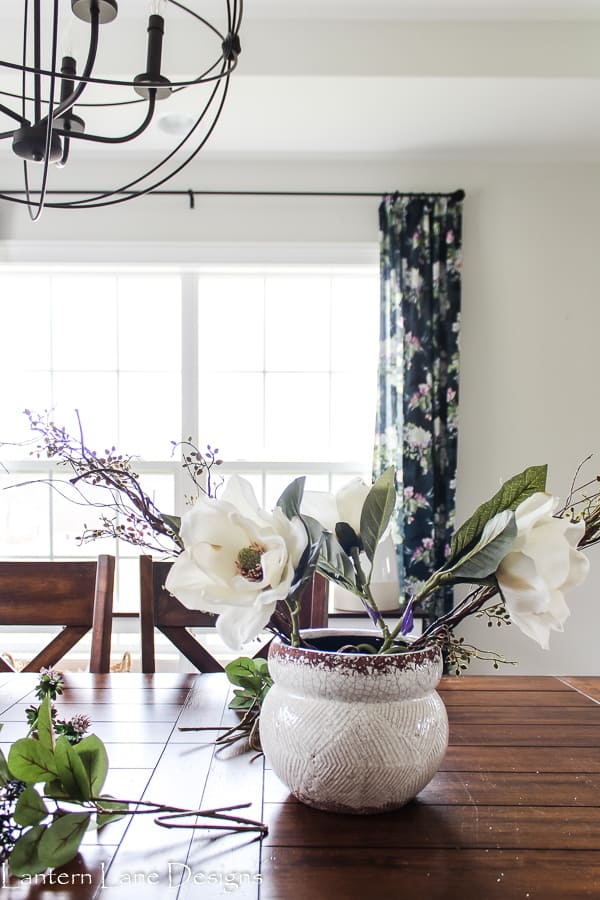
- Large Floral. I used Magnolia Stems but anything here will work. Hydrangeas, peonies, roses. Whatever tickles your fancy.
(I purchased everything when Hobby Lobby was having their half off floral sale. If flowers are not on sale this week, wait until next week and they will be on sale. I never ever pay full price for anything at Hobby Lobby. I know when all of the sales are)
Step 1:
Add black beans or rice to your vase. Obviously do not do this if you have a glass vase. You can use those marble looking things. What are they called? Oh, marbles. The more beans you use the better. (P.S. this step can be optional) The beans and rice help the stems to stay put better but you will have to use a good amount of beans
Step 2:
(You will have to tweak everything once it’s finished so don’t get too caught up in making it perfect until it’s done.)
After doing this for a few years, I found it is easiest to start with the taller stems first. I only used two tall branchy looking things.
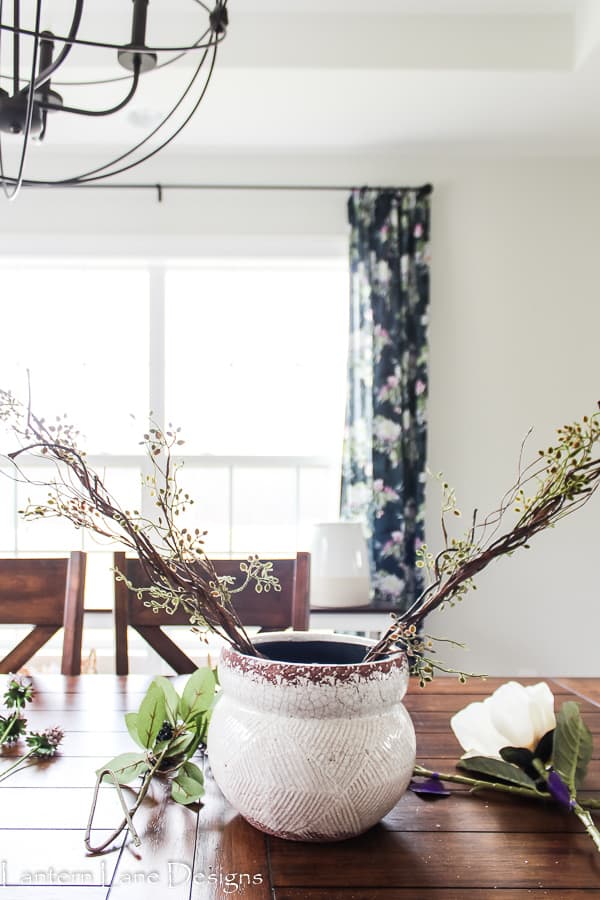
Step 3:
I then added in the Magnolia stems. My biggest tip is to NOT cut your stems. Instead, fold the stems. It gives your stems “legs” and helps them stay in place better. And if ever you decide to use them in another arrangement you can unfold the stems again.

When adding in your flowers, try to add them at different heights. At the end I had to adjust one of my magnolia stems but you get the jist.
(And yes, I still had the tags on. I always forget to take those buggers off until the very end)
Step 4:
Add in your low hanging greenery. I bent some of my stems so they looked more natural.

Last step;
Add in your last tall pieces where you feel you need some more height

And like I said above you will do alot of tweaking once everything is in there. Remember these are fake plants and are made out of plastic. You can bend it whichever way you want. I tried to get some things to hang down and some things to go up. The less symmetrical it is, the more realistic it looks. At least I think so.
And that’s all you have to do. It’s so easy and it’s fun to play. And I might add some more greenery in later on.
Some more tips I have for you…
Don’t be afraid to mix real and fake plants together. Mother Nature still thinks it is winter over here so nothing real is blooming but once it does, you better believe those magnolia stems will be temporarily replaced with my peonies from my yard
If you are using a glass vase I do not recommend my folding of the stem method. I am sure the stems of my flowers all bent up in that vase is not a pretty sight. I do recommend using real water in your vase though. Again, for the most part these plants are plastic. They can deal with some water on their feet. And your arrangement will look more realistic. You can always purchase one of those fake water kit at Hobby Lobby
If you have a taller vase and need your stems to stay in a certain spot you can always put a narrow vase inside your large vase to help keep those larger stems in place. Make sense? I did something similar with a different arrangement I have in my dining room. I put a few stems in the vase I put inside my crock and put some stems around too.

And there you have it! So easy and will make a great year round centerpiece. Just add in a few seasonal flowers each season and you are good to go. You can also see more about my dining room makeover here.
If you want to save this for later you can pin it here:
Come hang with me on Facebook and Instagram. Come Pin with me on Pinterest
[mailerlite_form form_id=8]
DIY Floral Centerpiece Using Fake Flowers And Easy Tips On How To Make A Flower Arrangement
You Might Also Like
Fall Front Porch Planter Ideas Using Fake Flowers
Easy DIY Planters Using Trash Cans