Easy ways to make your own DIY planters using inexpensive trash cans for your home decor
(This post contains affiliate links for your convenience. You can see my disclosure policy here)
Psst…You can find info about my front porch here.
Psst again…My rug is out of stock but you can find similar ones here
Remember that faux fiddle leaf fig plant I just made?? If you don’t-go check out the post and then come back. That little planter I put it in is a painted trash can.
For reals. Did I fool you??
Maybe? Just a little?
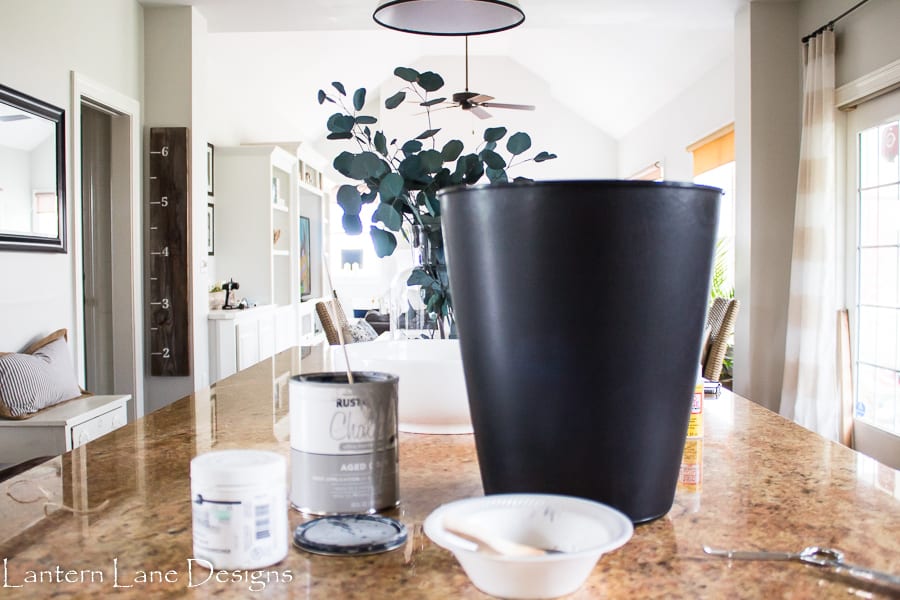
This was one of those projects that got invented in a random aisle at Big Lots. Maybe I’m a little crazy but I saw some trash cans and had to buy them…not for trash. That would make too much sense.
These little planters are perfect on a deck or a porch or anywhere there are kids (and/or a dog) that like to knock things over. I made a few different versions of my trash can planters. They were $3 each so I splurged and bought a few trash cans.
One trash can had to get thrown in the trash. Ironic, I know. I won’t even try to explain to you what the heck I was trying to do but it was a total fail. The other two turned out pretty cute for only $3 and some paint.
(This post contains affiliate links)
For the white planter I made for my fiddle plant I used white acrylic paint. You can use chalk paint as well. I used a cheap chip brush and went to town painting my can. I purposely left the lip of the can black as well as the inside of the can. I like the contrast and makes it seem less of a trash can.

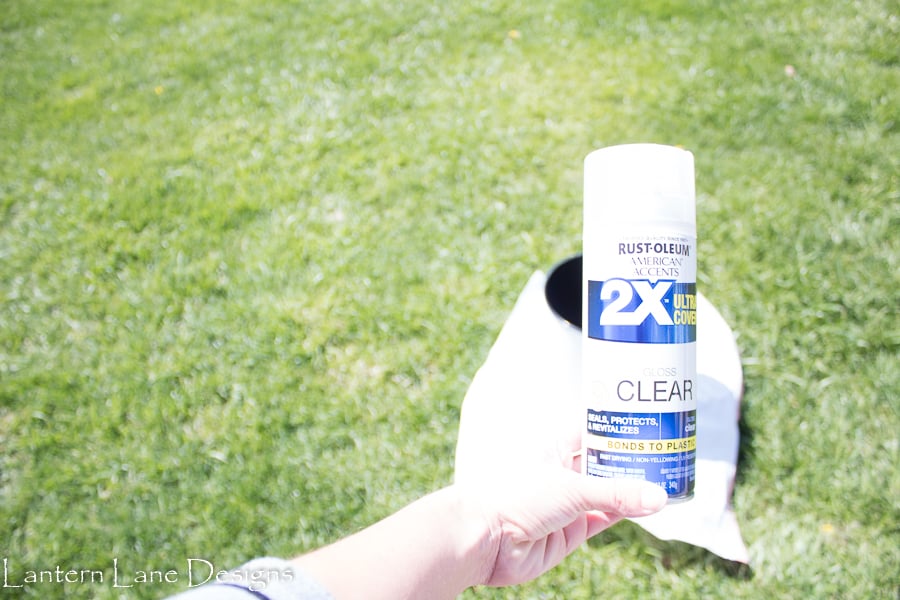
Once the paint was dry I used Rustoleum clear spray paint in GLOSS. This helps seal the paint and gives the can a slight sheen. I sprayed the whole can including the inside of the can.
I let my can dry completely and added in my fiddle leaf stems. Check out this post for more details on how to make your own fiddle leaf plant. I’m pleasantly surprised with how well this whole DIY project turned out.

While my white can was drying I moved on to can #2. I used a black trash can again but this time gray chalk paint. I did this one a little differently to give my can a concrete-ish look. After I painted my trash can with the gray chalk paint I quickly dabbed a waded up paper towel on the wet can. If you ever sponge painted anything in the 80s you might have a few flashbacks.
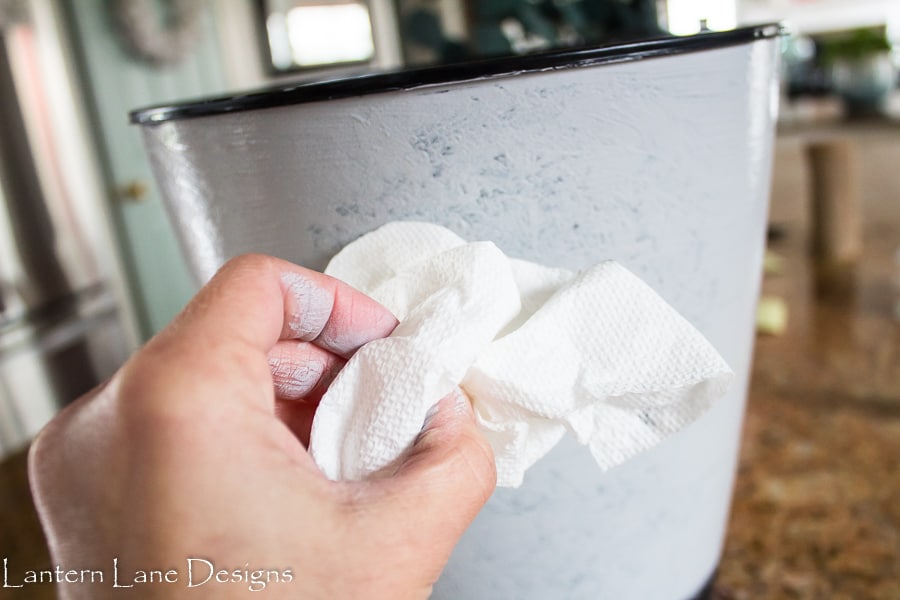
You can also work in sections while doing this so the paint doesn’t dry before you get your paper towels out. The paper towel took off just enough paint to expose some of the black on the trash can.
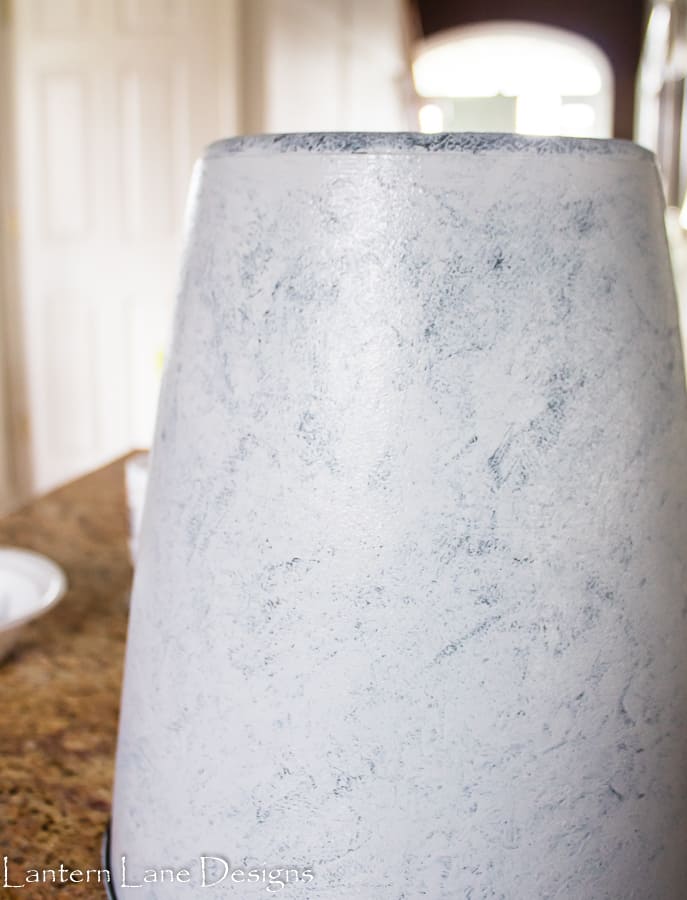
I sprayed this can with a clear MATTE spray paint just to seal it. I didn’t want this one to have a glossy finish. I would also recommend drilling some holes in the bottom of the “planter” if you think you will need some drainage. It has been so cold here this spring that I’m not convinced it’s done snowing so I am still using my favorite faux plants and flowers in my planters. I really love how easy and inexpensive this project was. You can’t beat a $3 planter. Am I right or am I right??
Want to save this for later? Pin it here:

Easy ways to make your own DIY planters using inexpensive trash cans for your home decor
[mailerlite_form form_id=4]
Come hang out with me on FaceBook and Instagram and pin with me on Pinterest!
Other outdoor planter ideas you might like!

Front Porch Planter Ideas For Summer

Front Porch Planter Ideas Using Fake Flowers

How To Make Your Own Fiddle Leaf Fig Plant
