How to make decorative orbs using embroidery hoops.
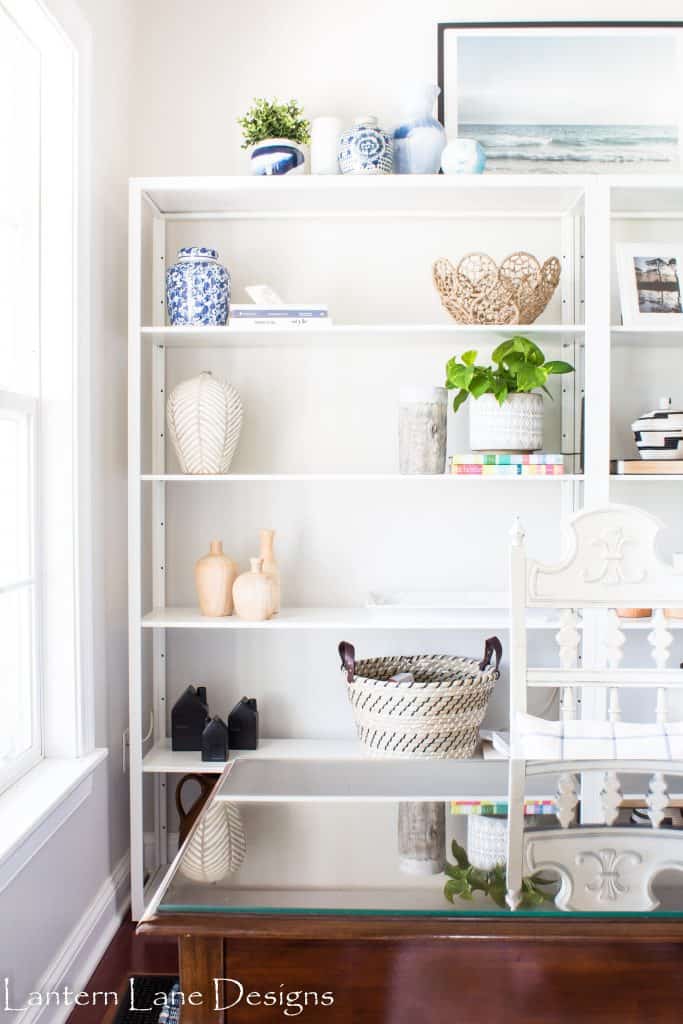
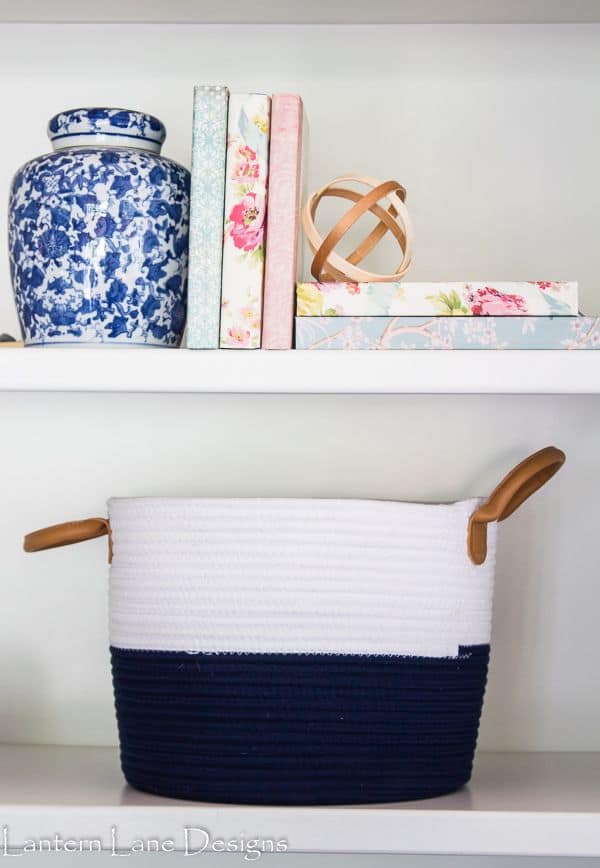
When we first moved into this house I was all giddy because we had bookshelves in our family room. The giddy quickly turned into panic when I realized I had to decorate those shelves. I had nothing to put on them and I didn’t want to drop a small fortune on bookshelf decor.
And then I added to my bookshelf collection and started panicking even more when I purchased IKEA shelving for my office. And yes, you can always throw some books on your bookshelves and call it a day. But who does that anymore?? Just kidding. I read books….sometimes
We have a few bookshelves in our basement that are dedicated to only books. Our bookshelves in the family room and office are purely for looks and just a tad bit function. My husband thinks they are useless.
Over the years I have done quite a good job adding things to my bookshelf. You can thank Amazon for that (this post shows you how crazy I am with my Amazon shopping). I have also made a few things myself. I covered the spine of a few books with craft paper to add a pop of color to my bookshelves, painted some vases, and marbled other vases. I like finding fun and easy DIY projects to add to my collection. I kept seeing these DIY decorative orbs on Pinterest and I knew I could make my own to add to my home decor collection.
How to make DIY decorative orbs using embroidery hoops:
Items needed:
(This post contains affiliate links for your convenience. You can see my full disclosure here)
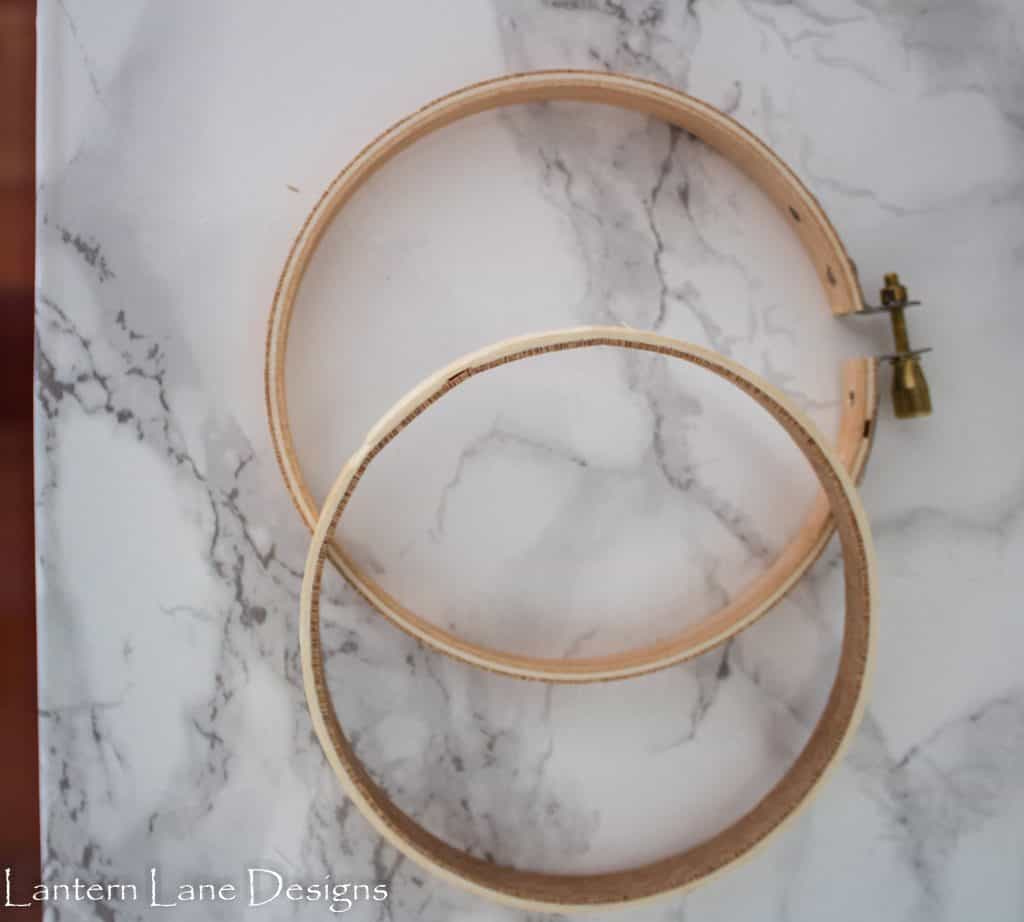
- Embroidery hoops. I found mine at Walmart but you can find them at any craft store as well as Amazon (here)
- Push Pins (optional)
- Paint or stain (also optional)
Your first step will be optional and I skipped this step. You should paint or stain your hoops first. I like the natural wood look and it was one less step for me so I was all about skipping step #1. I used two different sizes of embroidery hoops. My larger size was 8″ and my smaller size was 4″. For the smaller ones I took apart two embroidery hoops.
Yes, that is a picture of one embroidery hoop but you get the idea. Take two “insides” of two hoops and put one into the other as such…
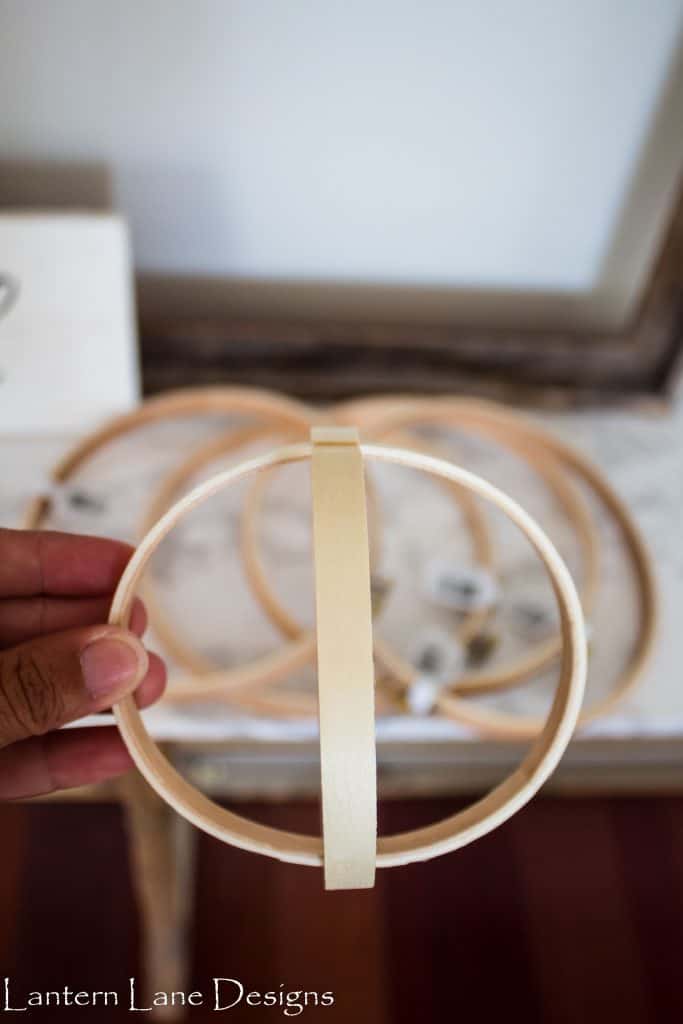
And then grab one of the outside pieces and put that ball you just made inside the outside piece. Make sense?
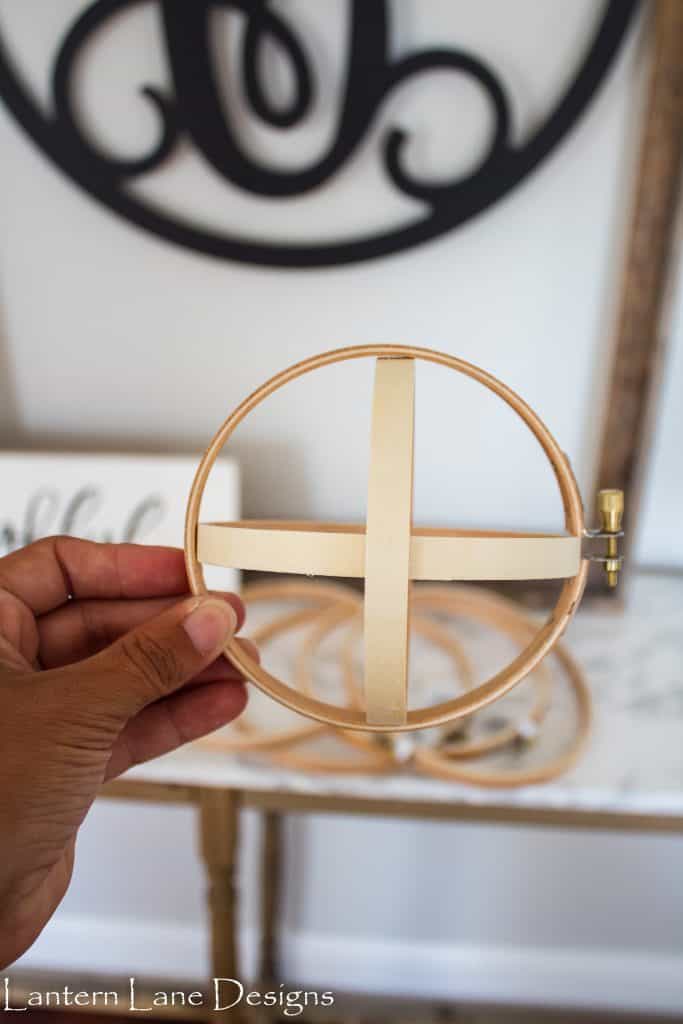
Since these orbs were smaller I stopped there. If you want you can add one more “outside” piece to your orb. Since it was so small I knew I could get away with just one.
For the larger embroidery hoops, I used a push pin to secure my two inside hoops.
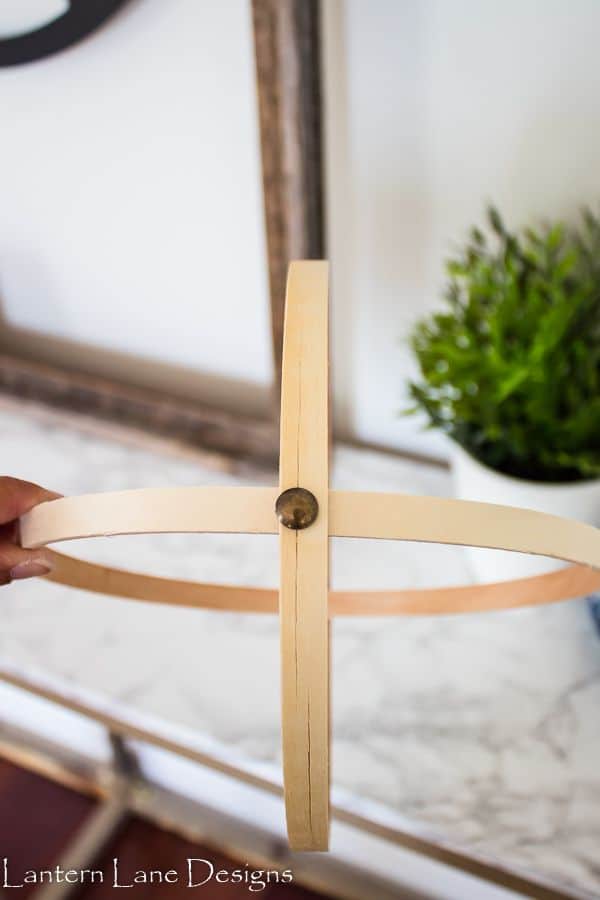
I then added two of the outside hoops around the inside hoops. I just played around with it until I got it how I liked it and called it a day.

These little guys took 5 minutes to put together and they make cute little (inexpensive) decor! My favorite kind!
If you want to save this for later, you can pin it here:

[mailerlite_form form_id=8]
You Might Also Like