How to update furniture using Dixie Belle chalk paint.
If you stand still long enough in my house I might paint you with chalk paint. Kidding…sort of. I’m really starting to dig the stuff. I’ve been experimenting with different brands too. I’m taking one for the team for you guys.
Right now I can’t say I can give you a full detailed review on any particular brand but I can also say I’ve been pretty impressed with all of the ones I have tried.
For this table I used Dixie Belle Chalk paint. You can find it on Amazon but I recommend you get on their website and look for a retailer near you so you can see the different colors in person. The price is very reasonable (lower than the Amazon price) and there are a ton of colors and it goes on very well. They also have tutorials on their website that are really helpful.
Also check out their website as they have a ton of tutorials for painting furniture with their paint. I am just touching the surface with my console table
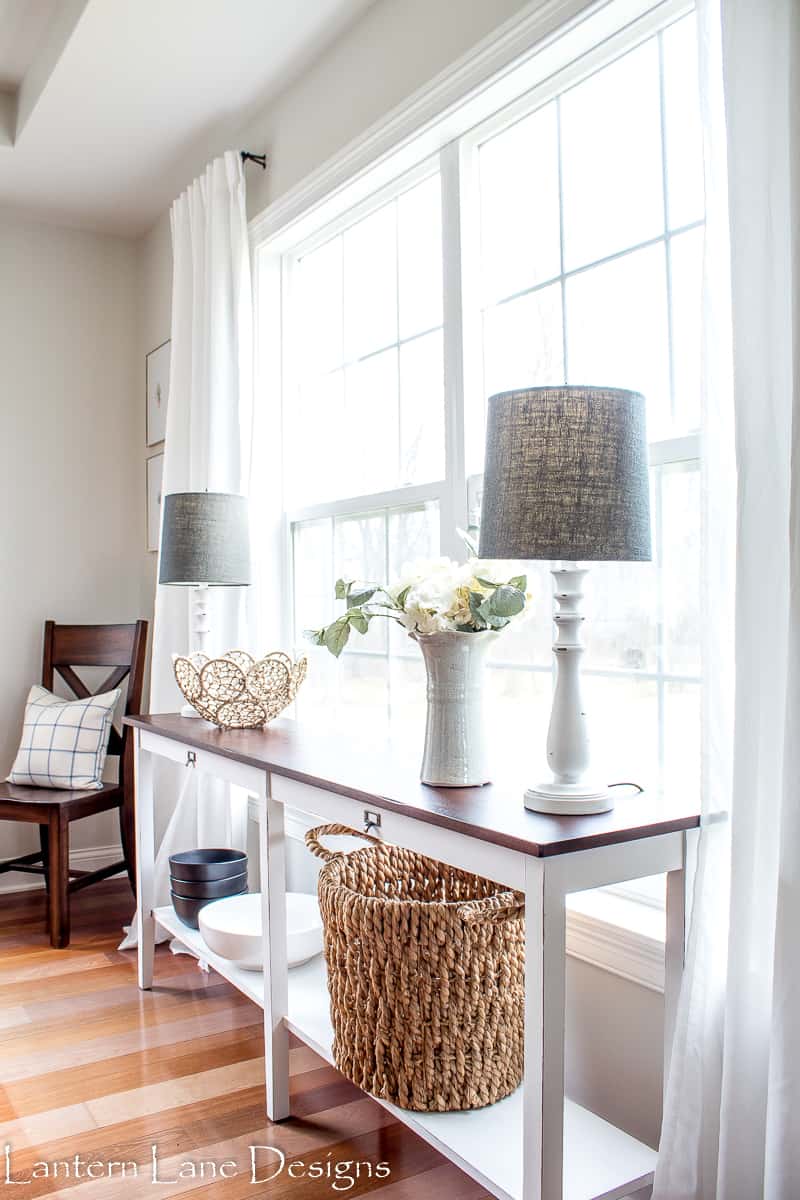
I stole this console table from my parents. Poor thing was all alone in their basement.

He was living a good life there though but he also said he wanted to come live with me (and get painted-he really said that-pinky swear). I was really really really second guessing if I wanted to paint him though. I had plenty of room in my dining room for him so he was going to be used more like a buffet.
Would you be surprised if I told you my dining room furniture AND this console table I stole from my parents are all from World Market? I know, shocking. I heart World Market.
The only problem though was that the dining room was looking heavy, dark and too matchy matchy since all the furniture in there had the same colored wood to it. I didn’t want matchy matchy. I knew I had to paint this guy. But the thought of messing him up was lurking in my head.
But I did it anyways and with the help of a four year old (something I do not recommend).
Items needed to paint with chalk paint:
(This post contains affiliate links for your convenience. You can see my boring disclosure here)
- Furniture you’d like to paint. Check your parent’s basement 😉
- Chalk paint of your choice (again I used Dixie Belle and really do think it’s great to work with)
- Cheap chip brushes
- Card Catalog Hardware (optional)
- Sanding block
This is where I should tell you that you should clean your piece prior to painting or give it a light sanding even though that isn’t really needed with chalk paint.
Buuuuuut…I didn’t do either of those. Don’t tell the painting police. I might have wiped off the dust with my hand as I was painting but that was about it. This table was in good condition. If it were rough I would have done those things above…maybe.
After you clean your piece with your hand just start painting. I used a cheap chip brush because that is what the lady on the Dixie Belle’s website said to do and I’ll have to say it was much better than using my expensive high quality paint brushes. The chip brushes hold less paint and you want light coats with chalk paint.
I also added a few drops of water to my paint. This paint gets thicker the longer the lid stays off so by adding a few drops of water every now and then I kept my paint thin. I felt like the thinner the better for this piece.
The first coat went on easy. I did have to do some damage control to where the little one was painting. It will look streaky and possibly blotchy after your first coat especially if you watered your paint down.
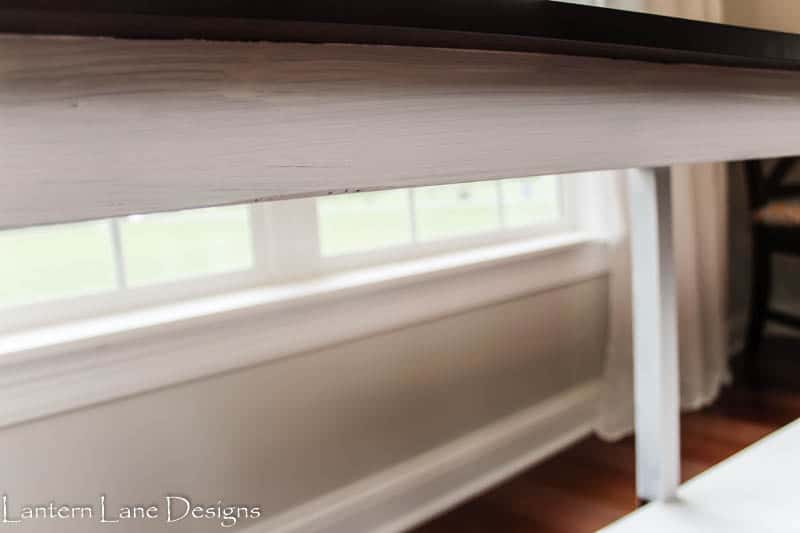
The second coat went on easier probably because this is when the little one got bored and let me paint solo. The streaks and blotches left and it dried to a nice smooth finish.
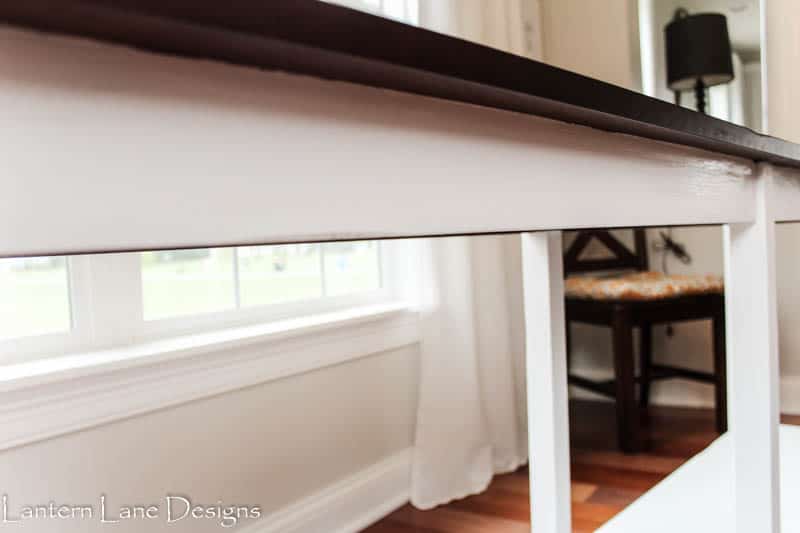
I did go over it gently with a sanding block to smooth it out after it was completely dry and then I went harder on the edges to get a distressed look. I have no idea what grit my sanding block is and it is half chewed by the dog.
I did use alot of pressure for the edges so maybe a higher grit would be best to distress the piece. I wanted to just distress the edges only. You can go harder and do more distressing and/or apply an antiquing wax. I opted for less distress on this piece.

I had some left over hardware from my DIY storage bench so I used a couple on this piece as well to mimic the look of drawers. It just looked like it needed something after I was done painting it.

I left the top untouched. It was a happy compromise for me. The thought of painting it and messing it up was less taunting knowing the top was staying the same. And it still looks like it belongs with the rest of my furniture but isn’t so dark. And yes, I painted my lamps with the same paint and distressed those as well.

I’m loving my new table now. He was always a nice table but now he belongs with me. And in case you were wondering the console table I made is still alive. He just got moved to the hallway to make room for our new friend.
PS…I did not add any kind of wax on my piece. This paint dried to nice smooth and durable finish. If I had this table in a high traffic area maybe I would have used a clear wax on it. But honestly it is holding up just great without a protective coat.
PPS…I jumped on here a year and half later to give this post a little update and I can’t believe how much has been done to our dining room since I painted this console table. This console table hasn’t moved from it’s spot though. It is one of my favorite pieces still and is holding up great.
And if you look closely enough you will see that I still have not painted the back leg of the console table that I completely forgot about.
You can see more about my dining room makeover here.
(and in only seems fitting to update my pinterest image as well so here goes…
If you want to save this post for later, you can pin it here:

Follow Me!
Pinterest//Instagram//FaceBook
[mailerlite_form form_id=4]
You Might Also Like!

How To Paint Interior And Exterior Doors